This is a follow up to my previous post and once again, I don’t have access to the Disney Feature animation tools so those findings and screen captures are only from various popular behind the scenes videos, some of them are posted below. This said…. I never ever managed to see any pickers from BlueSky studios!
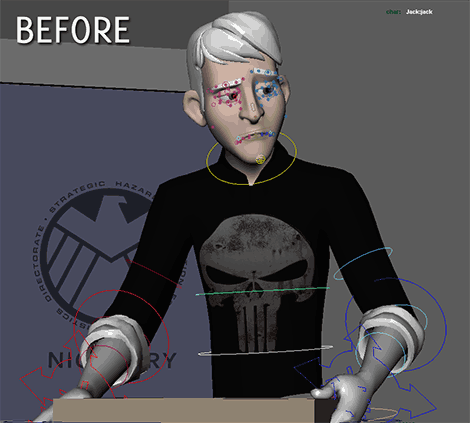
Olaf body and facial picker
Disney animation fans and especially animators, are very familiar with dAnimPicker, the Disney animation picker, a good looking and very functional picker with some really cool features (zoom and pan), similar to the AnimSchool picker and the good old abxPicker.
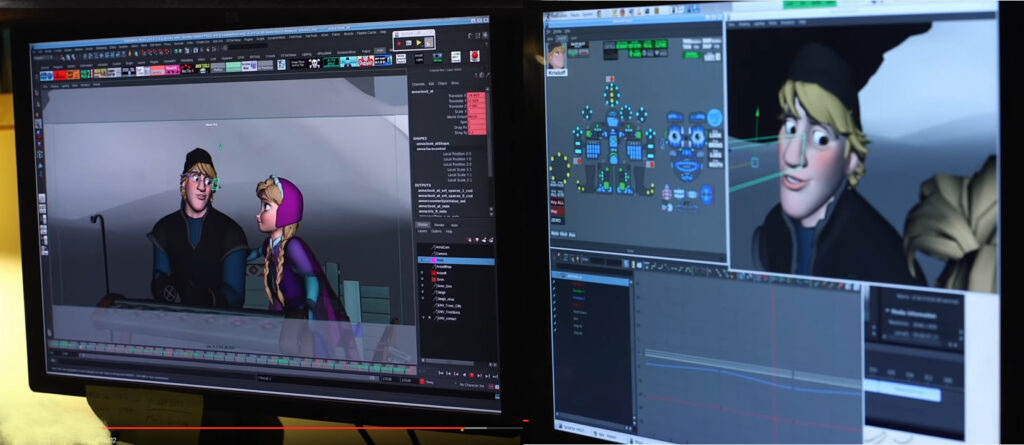
Kristof Picker (Frozen)
The dAnimPicker has some great additional features like the pickwalk, to easily navigate from control to control, and anchors, to quickly jump to predefined position like the face picker, or body picker.
Kristof and Anna facial and body pickers
You can see the interaction between the animator and the picker, 9:03 into the following video:
Having never seen that sort of picker in past researches, I was really surprised when I came across two similar looking pickers: Locus and Character Toolkit Designer.
After bumping on Locus through Pinterest with a totally unrelated research, I was finally able to track a video demo of the apparently commercially available picker from Korean based Locus Animation studios. (there are more demos on the Vimeo channel).
The similarity with dAnimPicker is pretty striking but wait until you see Character Toolkit designer!
The resemblance is stricking right?
I am not sure if ILM TD Davoud Ashrafi, the creator of the tool, is the actual creator of the Disney picker or if he just got inspired by it as he keeps mentioning, but the demo on his Vimeo channel is fascinating. The creation part of the tool very exciting compared to other tools and I especially love the mirroring feature, this would have saved me a lot of time.
Let’s finish up this post with more related Disney behind the scenes videos and don’t skip the Wreck it Ralph videos where you can also see the body controls visible in the Maya viewport. Pickers are good when the screen is too cluttered but on-screen controls are preferable.
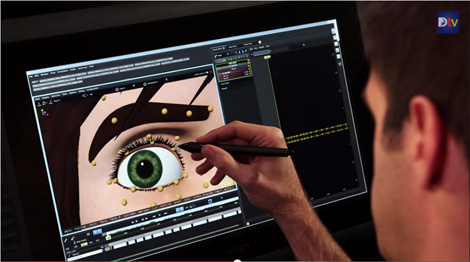
In 3:02 of the following video, you will see the eyelashes controls. Crazy right! I already mentioned that the animators shape the eye lids at Disney in a previous article.
In the following videos, we can see how the animators (here Disney guests) interact with the body parts directly in the viewport.
[addons] 2018.10.01. v02.01 section 17 added relative to colourblindness
This is an updated version of a previous post I had written 5 years ago and that I think will still be very educational after having spent 5 more years in the industry.
If you want to become a rigger/character TD and even if you are already one, you might be interested to read the following notes, you will make animators’ life easier, allowing them to pull off better shots in the same amount of time or even quicker which will, in return, make the director and producers happy.
The same way it is important for a modeler to understand part of the rigging process, a rigger should also get a grasp of the animation workflow.
So how can you become a rigger that animators are happy to work with?
– Start with a good attitude, ask for feedback from the animators and embrace changes, be willing to discard that crazy automated function you thought would be really cool but animators find unusable when doing actual animation work. As Eamonn Butler put it when we visited Double Negative London in 2006, character TDs work for the animators, not the other way round and Disney often refers to Character TDs as stewards for the animation.
– Educate yourself and stay informed by reading rigging books and dvds, read blogs! Rigging Dojo is one of my favorite blogs, they keep posting remarquable interviews. Participate to public forums where you can interact with other professionals, check other rigs! Currently I am watching Josh Sobel tutorials, it is a set of tutorial where he explains how he made the adorable Kayla rig. Watch showreels and even students showreels! There has been instances where Interns or fresh graduates we hired were more knowledgeable than staff who had been at the company for years.
Personally, I have learnt rigging through several dvds and those should be compulsory for anyone wanting to become a good character TD so here they are:
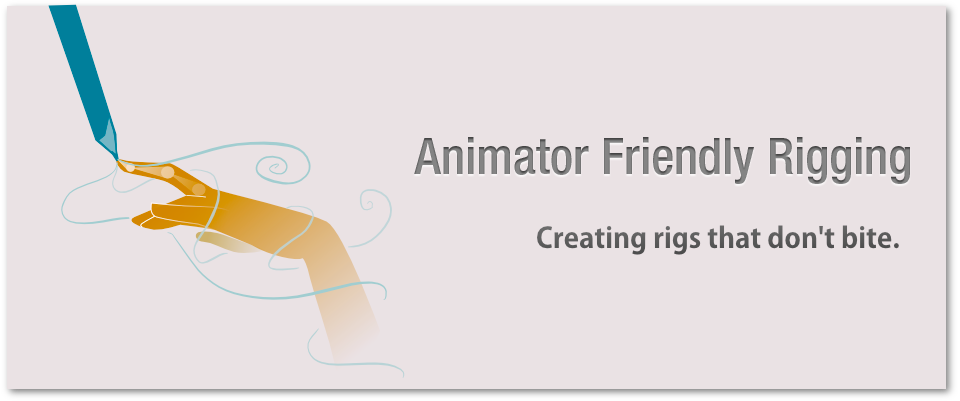
Jason Schleifer“Animator Friendly Rigging”. That set will take few hours to go through but exposes the most important rigging concepts
Jason Schleifer“Maya Fast animation rigs”. The DVD is well over 5 years old and only 1h20 but still is a must for someone who want to be liked by his peers. Interestingly enough I just checked and Jason is now offering his educational material on a donation basis so you can pay what you think is fair.
Fahrenheit DVDs. I actually started with those which was really hardcore but that was a very good learning experience. I am not sure those are still available.
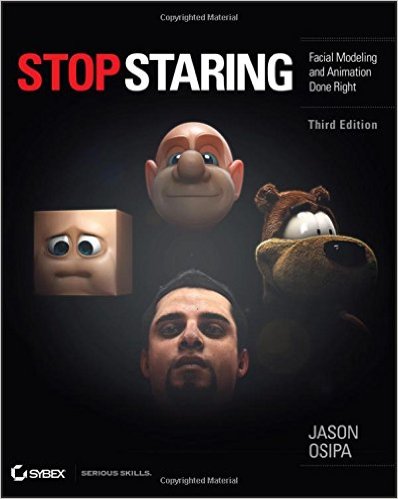
Jason Osipa stop staring
Jason Osipa“Stop starring, facial modeling and animation done right”. A new edition just came out and I should probably get that one too. Jason goes in length about facial rigging and you should definitely spend some time understanding what he is talking about.
You have ordered them all? Okay so while waiting for them, I want to mention few things that irritate seasoned animators when using a new rig:
1. Slow rigs. Rigs speed is the hot topic of 2015. Disney, in a talk given at Siggraph this year said the following: “Rig speed is of paramount importance to animation pipelines. Real-time performance provides immediate feedback to artists thereby increasing the number of possible iterations and ultimately leading to higher quality animation.”
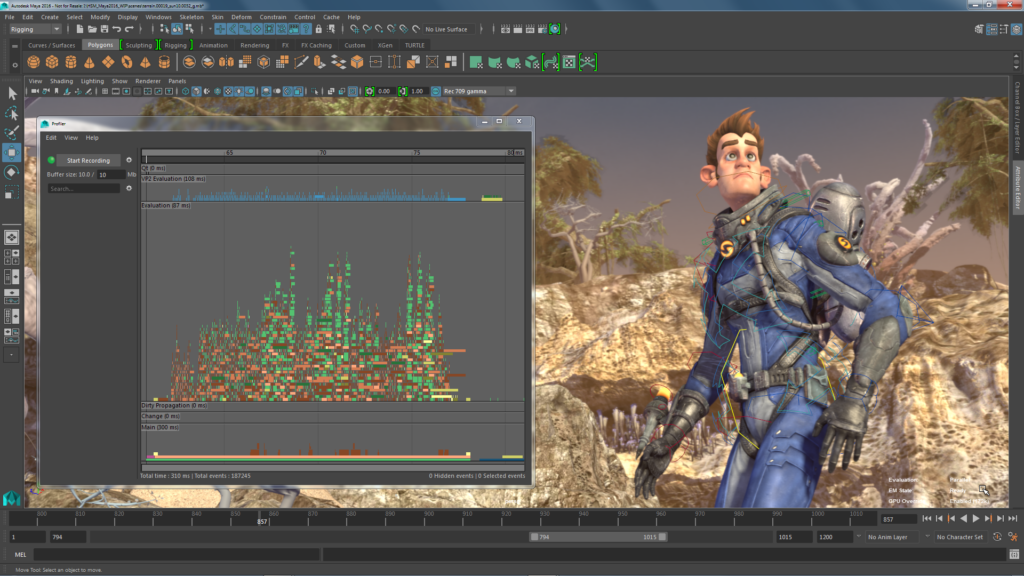
Dreamworks and Pixar had already understood it and realtime performance was one of goal they have achieved with the recent release of Premo and Presto, their respective animation software last year. On their footsteps, Autodesk finally unlocked the full potential of modern computers with the Parallel Rig Evaluation toolset in Maya 2016. Maya users can now troubleshoot slowdowns and calculate mesh deformation and some deformers using all the CPU AND GPU cores present on a system, speeding up dramatically the framerate in Maya’s viewport. Make sure you read this previous article I wrote http://www.olivier-ladeuix.com/blog/2015/11/26/maya-monday-maya-2016-parallel-rig-evaluation/
– If you are stuck with Maya 2015 and below, the old school method of speeding up rig involves replacing all expressions with nodes and create low poly or proxy version for the animators to work with. When working on body mechanics, animators don’t need the facial blend shapes or corrective shapes to be activated and when working on facial performance, body corrective blend shapes don’t need to be activated either, just a proxy version of the body to get an idea of the overall motion.
Disney Feature artist Sergi Caballer seems to have a nice feature where the animators can quickly isolate part of the body to speed up the rig. (read this great interview with Sergi on the Rigging Dojo website)
2. Rotation orders. This is probably my biggest pet peeve. When creating your rig, pay special attention to rotation orders and use smart rotation orders for the limbs. By default Maya uses the default XYZ order, meaning that Z is carrying all the other axis so you want to stay away from this as often it is not the desirable order. In the situation of the head for example, it means that as soon as the animator will rotate the head in Y, X and Z will start to line up causing a gimbal lock and making it difficult for the animators to work in the graph editor. Instead by using ZXY or XZY, the lateral rotation of the head would never line up with the forward rotation. Jason Schleifer spends a chapter on rotation orders in his DVDs so please refer to it.
3. Consistent translation direction. (thanks Richie) Animators need to be able to animate in the graph editor to troubleshoot problems or translate a character without using the global control so make sure your translations are consistent. If Y means up for the IK foot, it should also mean up for the hips and IK hands, same for X and Z.
4. GUIs As I am editing this paragraph 5 years later, it looks like Dreamworks is agreeing with me on that one so go and read: “Premo, the Dreamworks animation software“.
Personally I don’t like GUIs. Maya’s viewport is already so cluttered that I can’t see the point of having to keep looking sideway at an additional window covering, at best, a quarter of my screen when, controls could just be where they belong, on the surface of the geometry and toggled with a hotkey (alt +1 in the recent versions of Maya).
Most of the time an other quarter of the screen will be covered by the pose library leaving the user with hardly enough space for camera view, perspective view and graph editor.
I tried an interesting concept a while back with a rig where instead of hitting the usual nurbs controls, you select an invisible polygon encompassing the surface of the limb. Keith Lango posted a similar setup a while ago using Zootrigger, myself I just parent constraint the Nurbs control or the joint to an invisible proxy box instead.
This could prove complex when selecting facial controls though so, fast forward to 2015, I just realised that Nurbs controls AND Geometry can be easily toggled through a script so animators don’t need GUIs as often, as long as the controls are streamlined and don’t overlap each others too much obviously (see point 9). I perfected few toggle scripts and I will share them with you in few days.
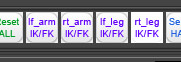
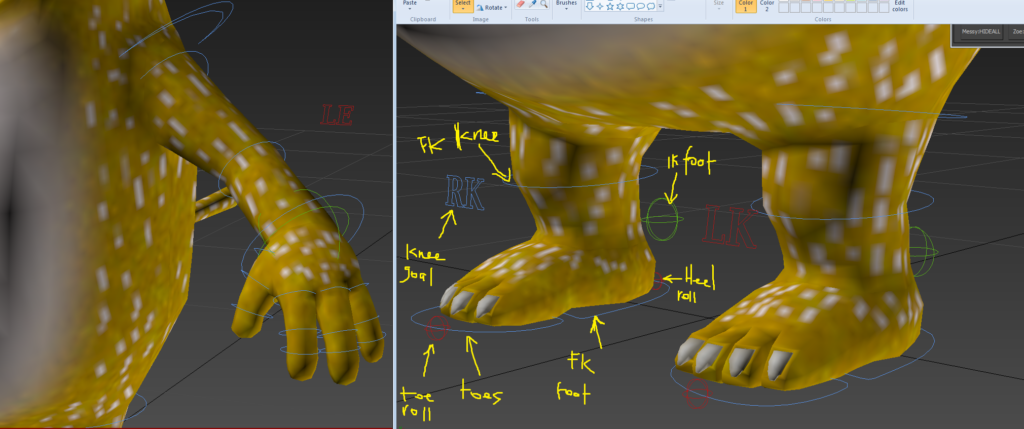
5. IF/FK switches WITH no-pop It is obvious that animators need IK and FK for legs and hands but you should also consider a script that would allow the animators to switch very easily from IK to FK and reverse without going back to the T pose. Some people call this IK snap, IK match. A script was provided with the goold old Norman rig to do that kind of thing
IK/FK switch buttons with no pop
6. Elbow and Knee lock. The animators should be able to lock an elbow to a table
7. Scaling Rigs should be scalable! Numerous time I ran into situations where we needed to scale the rigs and the rigs didn’t allow for this.
8. World orient/local orient switches for head, spine, arms …. Animators should be able to switch the alignment of the FK Head, neck, arms to the world or their parent by default and ideally a tool should allow to switch the parent space on the fly.
9. Bend bow and noddle arms. I am liking this a lot as it helps to make the rig look more organic or more cartoony in the case of noodel arms as seen below.
[vimeo][/vimeo]
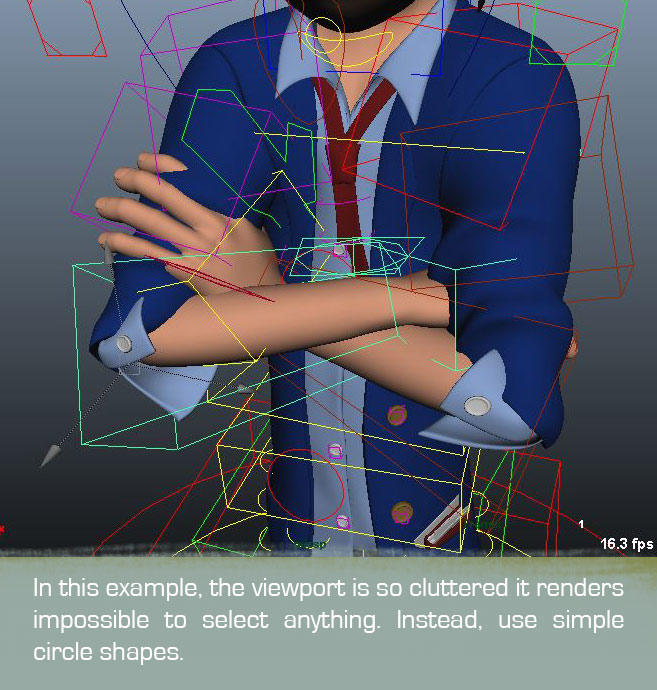
10. Cluttered viewports. Nurbs controls don’t need to cover the entire model, make them clean and simple, if possible make them invisible (cf GUI). A simple circle is more than enough for selecting controls, no need of an entire box shape especially for fingers or arms that will irremediably start overlapping and rendering impossible to select anything.
As a side note, when using circles for the fk spine, try to add an indentation at the front and back of the circle just to be able to quickly assess the offset of the spine controls. I normally take the center vertex of the nurbs circle and shift it up a bit then adjust the bezier curves like below.
11. Non consistency in the control’s boolean channel. In boolean operations, 0 should mean “No” and 1 should mean “Yes”. ie Shoulder parent 0 should mean that the IK hand is not parented to the shoulder. You could actually do the opposite, but as long as it it consistent throughout the rig.
12. Set me free. Animators are artists and they might want to break an elbow, pull fingers to create smear frames, pull the lips much higher that reality would suggest in order to stylise the motion so don’t restrain the animators to what is anatomically possible, unless you want them to come up with really stiff animation.
13. Pole vector switches. Pole vector should be centered right in front of the knees or elbow, not closer to one or the other joint and they should have a switch to the world just so they don’t follow the orientation of the foot or IK hand at all time.
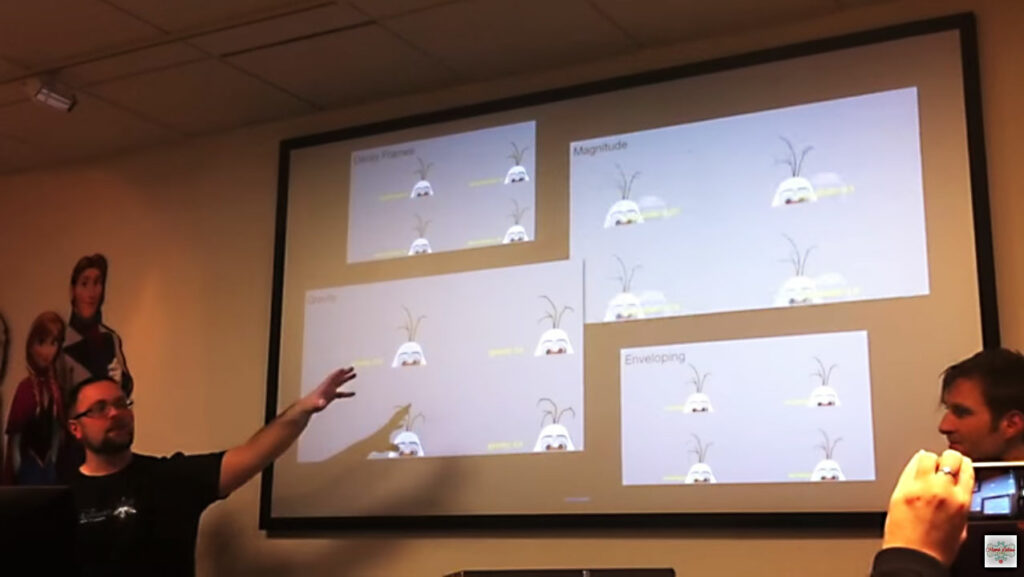
14. Automated overlap/bakeable simulation. Automated overlaps for secondary elements can add so much life to a rig without the animator to do much work. Think about little appendages like ears, tails, ponytails, little bit of clothing or foot straps in the case of the following Disney demo however, animators should ultimately be able to make changes to the automated result which is why the joints animation should be bakeable.
On “Messy goes to Okido”, I would first pose Messy’s tail in it’s trademark curled pose, then ran a script to simulate overlaps and would finally created a motion based on a blending of the two. This gave a life like feel that was still designed.
15. Autorigs/programming. In production nowadays, there isn’t much room for a TD to rig all the characters from scratch by hand and this is not scalable for bigger teams so most large companies have their own autorigs and smaller one rely on off the shelf autorigs like mGear or Advanced Skeleton so you might want to get used to the latter unless you join a bigger company that will have their own workflow.
When I worked at EA I had to work on several prototype games and autorigs are what offered us the ultra quick turnaround required. Rigging and skinning were so fast that we were able to start animating the same day instead of relying on weekly turnarounds. I have been a long time advocate of the abAutorig so click the link below to see how autorigs work.
[vimeo]http://vimeo.com/14722424[/vimeo]
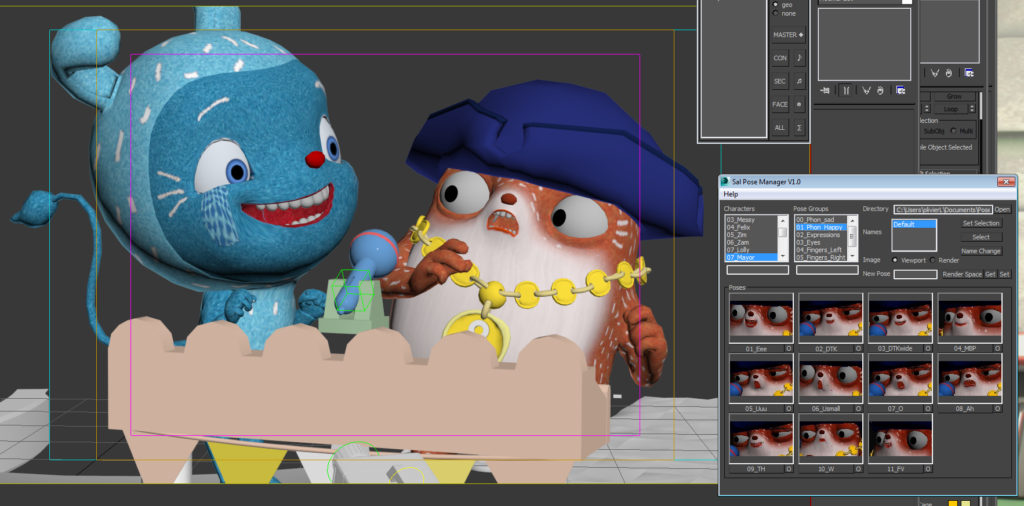
16. Pose and animation libraries. In production it is paramount for the rigs to be compatible with standard pose and animation library scripts like Kurt Rathjen’s Studio Library, Lionel Gallat’s PoseLib, or the very user friendly Sal Pose Manager by Salwan Badra for 3dsmax. Pose libraries allow the animators to work with extremely complex rigs and stay “on model” which is very important when hiring junior staff and a time saver for senior animators. Believe it or not, I have worked in TV productions where the rigs weren’t compatible with those scripts and animators had to waste an incredible amount of time recreating some poses or animation from scratch and often this meant they didn’t bother.
At AnimSquad which is often referred to as the Disney animation school since most teachers are Disney Animation Studios supervisors, we had a pose library that separated poses for when the character’s head was facing the camera, looking screen right or looking screen left as you normally use every single tertiary control to cheat the pose so it looks appealing from every angle.
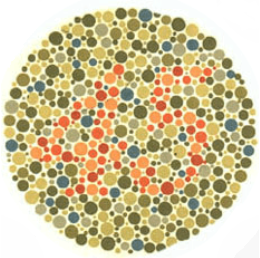
17. Controllers colours and colour blindness. 1 in 10 men and 1 in 200 women are affected by colour blindness. For most, green is a difficult colour to see so refrain from using the red/green or green/yellow combination. Instead you should favour colours that are widely contrasting like red and blue for example. I know it looks pretty ugly in term of colour harmony but rigs primary goal is to be efficient, not pretty. If you don’t know if you are colour blind, test your sight here, personally I am moderate colourblind and can’t see half of the plates http://www.color-blindness.com/ishihara-38-plates-cvd-test/#prettyPhoto.
Alright, that’s it for now and as a treat for making it so far, check out some really cool rigging showreels and “making-of” videos to get an additional creative boost:
Having studied Psychology and Ergonomy at University, it always bothers me when I have to use tools that haven’t been carefully thought out with the final user in mind.
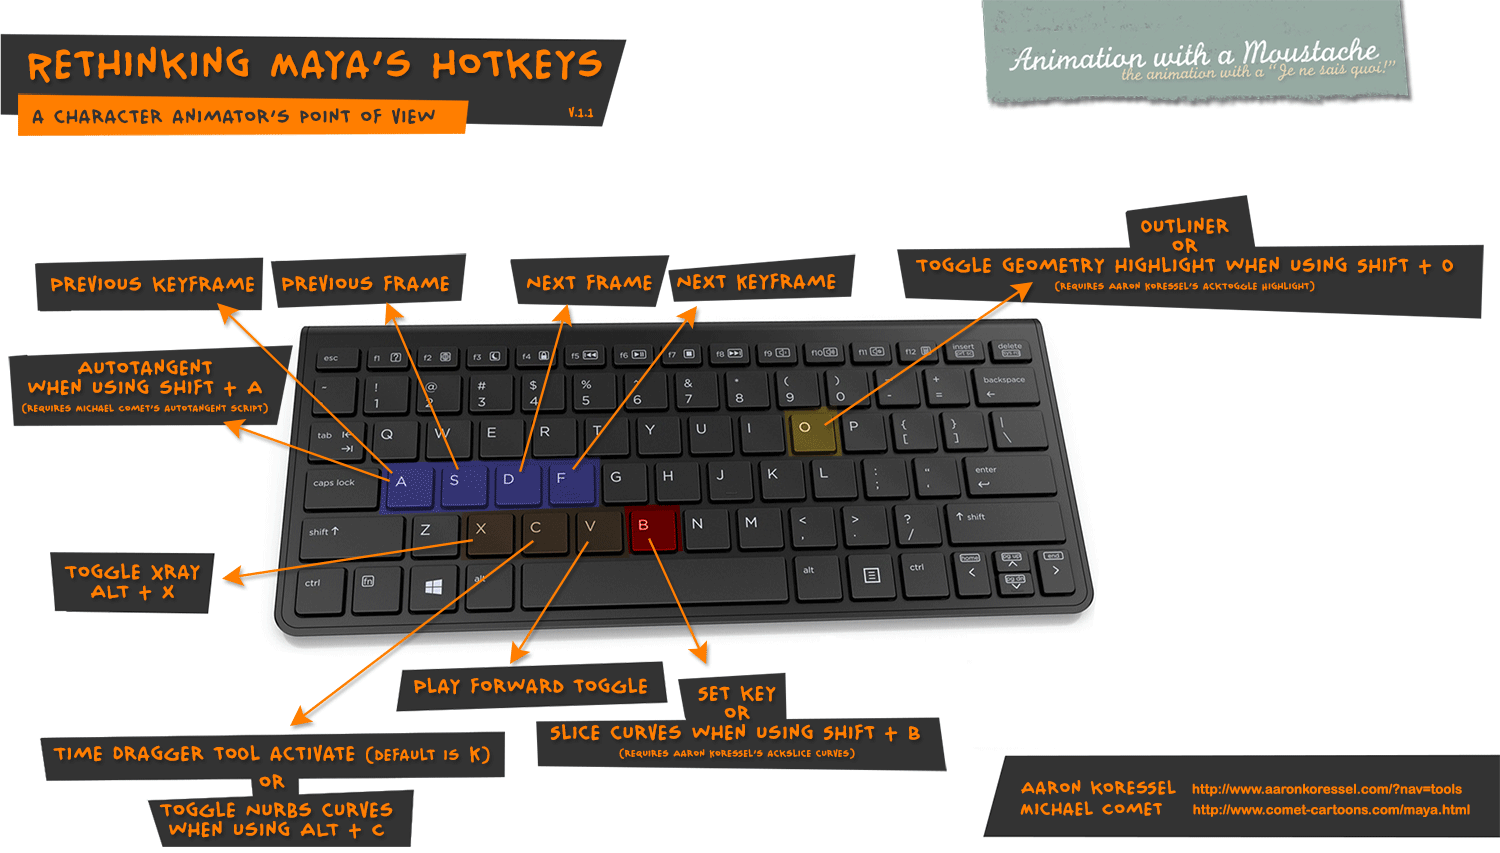
Personally I like to stay in the flow when I animate so I don’t want to have to look at my keyboard constantly when I animate. The least my hands and fingers travel, the more focused on my viewport and the more efficient I stay.
If you haven’t realised yet, on a keyboard, you have two bumps on the F and J key. This is a feature for “touch typists” that allows you to quickly locate where you are on the keyboard by feeling those two keys without looking at them. Touch typist would lay their index on them and muscle memorize the surrounding keys.
For Maya users, the F key is the most important one as Selection, Translation, Rotation and Scale (QWER) are just above it. To make things more efficient, I like to have my additional animation hotkeys, just below that area. Have a look at the attached picture.
Note the position of the next/previous keys and frames, this is the most important thing when like me you work in the manner of a traditional 2d animator and constantly “flip your drawings”.
If you want to know a little bit more about those crazy cartoony Looney Tunes short films Reel FX has been producing since last year, head out to the AnimSchool blog!
They just interviewed Reel FX Rigging Department supervisor Josh Carey and the article is pretty informative regarding their pipeline and the kind of R&D they do. I had never imagined anyone would create a “data mining” tool to evaluate controls usage and I think it is a great idea for a TD to see which ones are the most used.
There are also so useful tips for aspiring TD so check it out!
Out of the box, Maya is probably the most animation unfriendly software ever so every animators have their own set of scripts and hotkeys to palliate for Maya shortcomings and speed up their workflow.
To be fair, I don’t use many but the following ones are true “life saviours”. Some of them are shelf script, others are triggered by Hotkeys.
my Animation Shelf
I haven’t cleaned up my Maya animation shelf for a while, the two first buttons were customized windows layout but I don’t use them anymore. LLuis Lobera’s make button, Justin Barrett’s Tween Machine, Zoomerate and Xsheet are the ones I mostly use. Michael Comet’s Auto-tangent is now a Hotkey as follow (bare in mind this is with my french keyboard, I use A on english keyboards).
Auto tangents and other scripts triggered by Hotkeys
As I have been travelling a lot lately, I can only carry a 17 inch equipped laptop with me so full screen viewport and Hotkeys are a must.
Here is my current full screen viewport when in Blocking and first pass spline, I would normally create an other set of selection buttons for the eyes and facial controls when polishing. As you can see I don’t use any GUI but instead I toggle the Nurbs controls (avars/movers) with a hotkey (alt+c)
Full screen viewport
This is the script I use for Full screen switching by the way, the Maya built in hotkey (CTRL+spacebar) has been buggy on all the Maya versions I have used so far. The Hotkey is alt + z on french keyboard, alt + w on english keyboard.
Full screen script
This is my working window layout on a 17 inch screen in 1440×900 (yep it is a cheap laptop, no HD res here ;-)). Camera view on the top left, Graph editor top right and perspective view underneath. The TweenMachine window is taking a bit more space than required but hopefully Justin will soon post a leaner version or maybe Autodesk will pay Justin to integrate his script to the next version of Maya 😉 The graph editor channels column is also taking more space than necessary, Maya doesn’t allow dragging the divider further (antiquated Unix legacy….).
Right, that’s all I have time for today, I will add a Hotkey description in few days.
Because of my video games experience, I get asked once in a while what software should people learn to get a job in Video Games and unfortunately I don’t have a straight answer, it depends on the company and sometimes in even depends on the team.
At Microsoft/Rare we used Maya and since the company is now doing more and more motion capture, I have been told they also use Motion Builder on top.
At EA, the team I worked with on Spare Parts exclusively used Maya but the Harry Pottter team was also using a bit of Motion builder.
However, those two, with Sony, might be the exceptions as most companies use 3dstudio max. If you want to check this for yourself, you just need to go to any of the numerous british Video Games agencies like Aaswift, OPM Jobs, Amiqus, Datascope and go through the jobs specs. The job columns of Industry websites or monthly publications can also be revealing, here are two for you:
One thing I should also mention is that 3dstudio Max offers several animation technologies which have little in common so you might want to get confirmation whereas the studio you are targeting uses Biped/Character Studio, CAT or regular joint based rigs.
A website that could also prove very useful to find jobs in games but others industry related to animation as well is CG Studio Map. CG studio map is a website referencing all the animation studios and game studios. Some of the infos are not very accurate regarding the software used but it still remains a really good resource. Correct me if I am wrong but I don’t think Ubisoft Paris uses Softimage as their main tool.
As a conclusion, I think you will probably have to learn all the softwares so don’t be a fanboy, don’t get too hung up with that software you have spent years learning. I know it is tough, I am also going through the same thing but that’s the way it is if you want to stay employed.
The same way it is important for a modeler to understand part of the rigging process, a rigger should also get a grasp of the animation workflow.
So how can you become a rigger that animators are happy to work with.
Well you can obviously start with a good attitude. Ask for feedback from the animators and be willing to discard that crazy automated function you created but animators find unusable.
Read rigging books and dvds, post on forums, check other rigs and even students showreels, talk to people. Personally I have learnt rigging through several dvds and those should be compulsory if you want to be a good rigger so here they are:
Jason Schleifer“Maya Fast animation rigs”. The DVD is well over 5 years old and only 1h20 but still is a must for someone who want to be liked by his peers.
Jason Schleifer“Animator Friendly Rigging”. That set will take few hours to go through but expose the most important concepts.
Fahrenheit DVDs. I actually started with those which was really hardcore but that was a very good experience.
Jason Osipa“Stop starring, facial modeling and animation done right”. A third edition just came out and I should probably get that one too. Jason goes in length about facial rigging and you should definitely spend some time understanding what he is talking about.
So you have ordered them all? okay while waiting for them I want to mention few things that irritate me when I use a new rig.
1. Slow rigs.
If your rigs are very slow, make sure it is not because you are using expressions where you could use nodes.
Create a low poly or proxy version the animators can work with otherwise.
1.Weired and default rotation axis.
Head and torso should have the Y rotation carry all the other axis, X should be carrying Z and Z the last one. Basically, the rotation order should be something like ZXY but certainly not the default XYZ (remember, you read the axis order starting from the end)
Jason Schleifer pays special attention to the rotation orders in his DVDs so take notes when watching them.
2. GUIs
Well, not everybody will agree with me but ….. I can’t stand GUIs. Maya viewport is so poorly designed that I can’ t see the point of adding an other window cluttering my screen real estate even more.
I will share with you one of my latest setup very soon. It is a rig where instead of hitting the usual nurbs controls, you select an invisible polygon encompassing the surface of the limb. Keith Lango posted a similar setup a while ago using Zootrigger,, myself I just parent constraint the Nurbs control or the joint to an invisible proxy box instead.
[update]GUI are not so bad when they are truely necessary. To drive complex or additive blend shapes for examples (ala Jason Osipa joystick) but certainly not for selecting the lower or upper arm.
3. IF/FK switches WITH no-pop
It is obvious that animators need IK and FK for legs and hands but you should also consider a script that would allow the animators to switch very easily from IK to FK and reverse without going back to the T pose
4. Elbow and Knee lock. The animators should be able to lock an elbow to a table
5. Scaling! The rig should be scalable!!!!
6. World orient head, spine, arms. I want them all or I want to be able to set this up using constraints
7. Bend bow and noddle arms. I am liking this more and more and should certainly investigate into that
8. cluttered vieworts. Nurbs controls don’t need to cover the entire model, make it clean and simple, if possible, make it invisible (cf GUI)
9. non consistency in the boolean channel control. 0 should mean no and 1 should mean yes. ie Shoulder parent 0 should mean that the IK hand is not parented to the shoulder. You could actually do the opposite, but as long as it it consistent throughout the rig.
10. Set me free. Animators are artists and they might want to break an elbow or pull fingers to stylise the motion so don’ restrain them to what is anatomically possible unless you want them to come up with really stiff animation.
Alright, that’s it for now and as a treat for reading such a long post, check out some really cool rigging showreels and making of
If some of you are still struggling to use Supercrumbly’s awesome abAutorig auto-rigging script, or have no clue on how to rig/skin, here is something for you!
The video is real time and has now, me, commenting on the different steps involved. If you double click on the video this will sent you to Vimeo where you can save the Quicktime file in HD!
Moving forward, this is 1 hour of work in 5 minutes. I used Camtasia this time so the result should be a bit smoother. Unfortunately Camtasia pause button didn’t work so 2 hours are missing, you won’t see the entire panel detailing sequence and few other things. Sorry.