I don’t know where I got this from but here are some notes I had buried in my hard drive. I am guessing this is an answer to a Q&A with Disney animators who worked on Tangled.
Having attended Animsquad, I am aware about the importance of eyelashes and I had been told a while back that eyelashes could be animated on a show like Tangled.
Without further ado, here are the notes :
As far as eyes are concerned, for Tangled, We Payed HUGE attention to eye lids. every frame was tuned to Glen’s drawings for the max appeal. Another HUGE things we really spent time on were the eye lashes, Mainly Rapunzel and Mother Gothel. Glen stressed the importance of the lid shape, the tension in the lower lids, the shape of the lower lids, and where the eye lashes were pointing. In Alot of cases we would point the lashes where the character was looking, to help guide the viewer’s eye and boost the appeal of the character. I think the eye lashes and lid shapes are something really overlooked alot of the time, But these are HUGE tools that can be used to gain appeal and to show what the character is feeling.
Also some people think its the rigging. The rigs for these characters were very simple when it came to mouth and eye shapes. For the eye lids we only had three controls for the edge of the top and bottom lids, two corner controls, and open and close rotation controls. sometimes Less is more with controls, It makes it harder to get lost in the rig.
Hope that helps!!! On behalf of the crew, Thanks for the great comments!
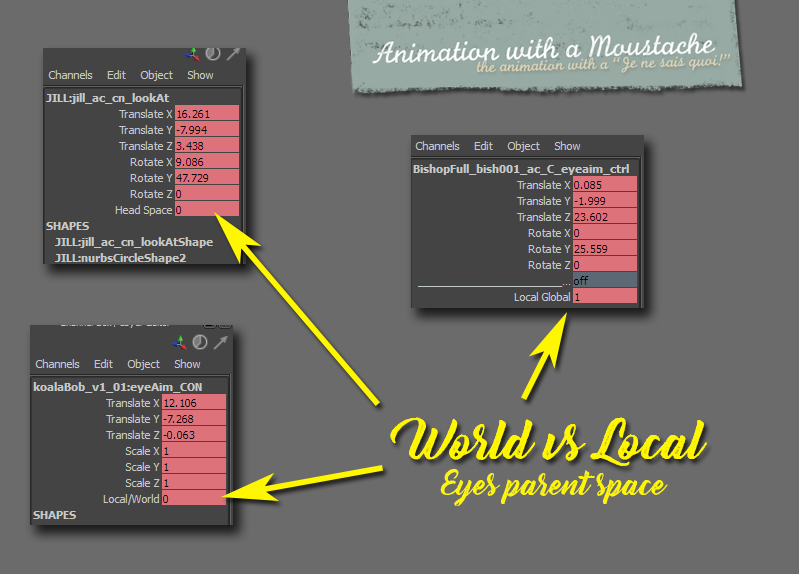
Animation rigs usually offer two options when animating eyes: “world space” or “local space”.
“World space” allows you to lock the eyes in a specific world location, and pose your character without having to worry about the correct eyes direction. That kind of space sounds ideal when animating a two character shot as the aim of the eyes will not move.
Instead, “Local eyes” allows you to lock the eyes in relation to the head so when rotating the head, the eyes will automatically follow the head movement which sounds … pretty useless and unrealistic doesn’t it?
Throughout Animation Mentor, I was a “world space eyes” animator. I didn’t understand why anyone would use Local Space but during a Q&A, AM superstar graduate Mike Stern who had already landed a job at Dreamworks, planted a seed in my brain when he mentioned he was using Local Eyes rather than World and from that day on, I knew I would need to get more experience with Local Eyes and see what advantage this method would bring.
Having worked in games mostly in my early career, I never really got a chance to do much acting, let alone testing eyes parent spacing. Going into TV series and taking part in AnimSquad finally allowed me the opportunity to get more familiar with the two methods and I would now mostly animate eyes in Local Space.
“World Space” allows you to accurately lock the eyes in a specific direction which seems great at first but the eyes often end up looking totally disconnected from the head and requiring just as much finessing than Local Eyes.
People might get angry at me as this is not what is normally done in education but sometime ago I had found a great example of unsuccessful eyes animation that clearly showed the use of World Space Eyes instead of Local Eyes and it is time to bring the example back!
Don’t worry I have already told the animator about it and hopefully he will take my comments in consideration in his next pass.
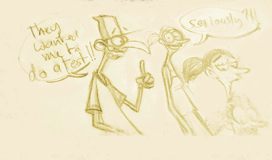
The shot I am referring to is the first one and specifically what is being done on Bishop.
Using this method, the eyes are perfectly locked in space but since they are not reacting to the motion of the head, they seem to be floating around the orbital cavity and totally disconnected from the head which looks very odd and inorganic.
Now that I have more experience with acting and having had Malcon Pierce insisting on eyes focus for literally HOURS during an Animsquad expert workshop, I have fully grasped the necessity to lock the eyes firmly on the head rather than on the environment.
Eyes direction in relation to the head and eyelids is the ultimate component of acting after all. Aside from the exception of blinks, even though I will talk about this an other time, a slight variation in the position of the eyes will convey a totally different emotion so you want to keep a tight grip over the positioning of the pupil and iris.
I hope this article was useful to you and I will leave you with a little something to test your … eyes 😉
This is a shot I animated some time ago. Do you think I animated Bishop’s eyes in Local space or World space? People with experience will have no trouble spotting the space used but see for yourself!
After few month working on Okido, I felt there was a lack of consistency between all the animators and decided to make a compilation of examples from my favourite animated movies.
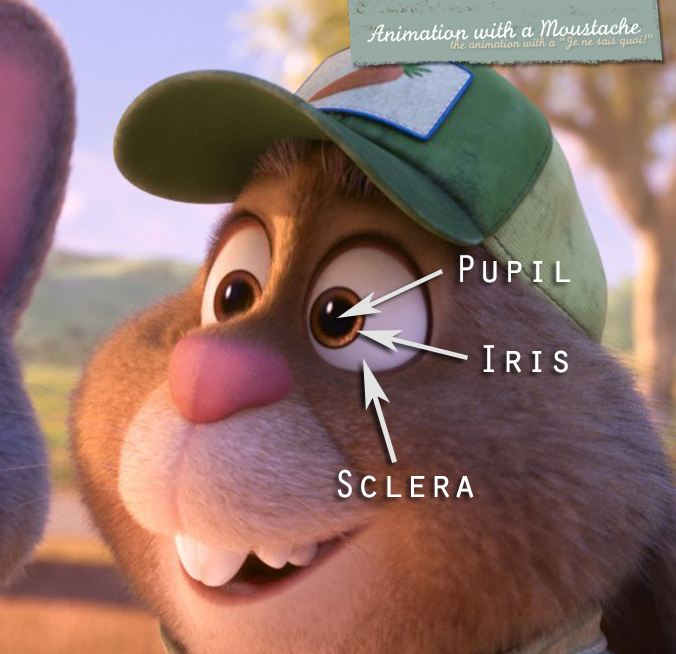
Cartoony eyes are usually so massive that unlike realistic eyes, the appeal is very quickly lost if you don’t know how to handle them. Clarity and appeal are the keywords when working on eyes so the first rule of cartoony eyes posing is :
1. Centering: Never, ever, have both eyes (pupils) centered on their respective orbital cavity. Instead and to avoid the zombie look, get the pupils closer to each others and have more space/white (sclera) on the outside of the eyes. This will create a more appealing pose.
2. Favouring: When a character is looking sideway, one eyes should be centered and the other one much closer to the bridge of nose or even intersect with the orbital cavity but we still need to see part of the pupil to imply the character can still see with the far eye.
3. Focus: As the character focuses on an object really close, you might want to increase the space on the outside of the eyes but when the character is looking far away, again, do not center the eyes! (see rule 1)
4. Surprise Even when trying to communicate surprise, we still revert to rule #1 and have more space on the outside of the eyes BUT, it can still be accepted to narrow the white on the outside for really cartoony “takes”
5. Sideway If your character is totally sideway, cheat as much as you can just so we can still see a sliver of the Iris
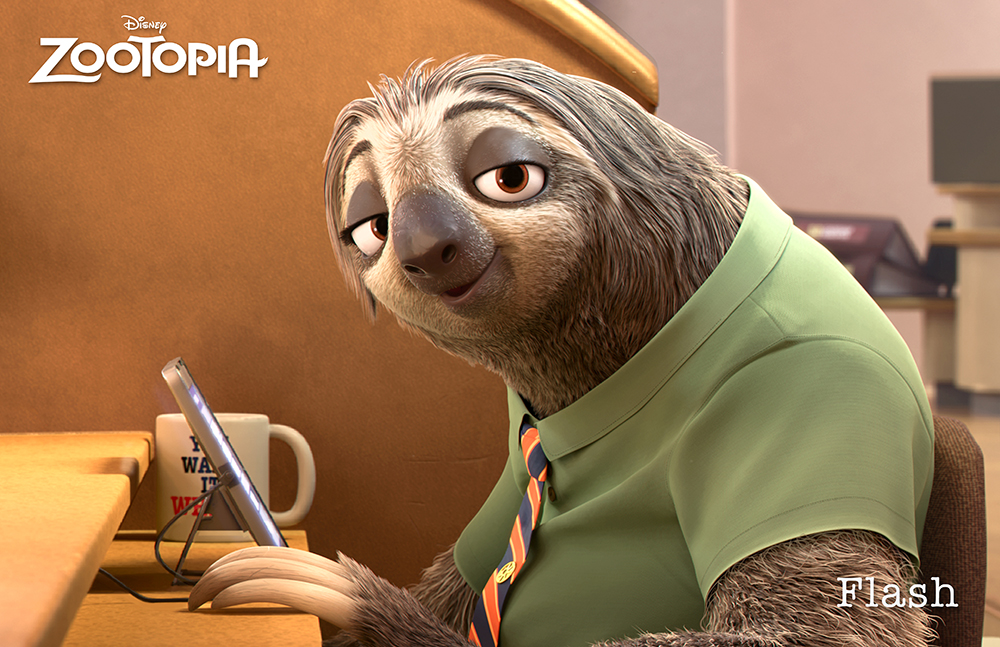
Bonus tip: Pay attention to the way the top lid is shaped on half lidded character in Zootopia, especially Nick. This will be included in a forthcoming article about stylised animation.
I hope this will help some of you, the following images are for education purpose only and copyrighted to their respective owners Disney and Pixar: