Impressive fan made Elsa rig
Posted on July 14, 2016 |
1 Comment
Filed under Animation, Education, Modeling, Rigging
Youtube user Spiel Kind is sharing a walkthrough of his impressive fan made Frozen’s Elsa rig.
[youtube]http://www.youtube.com/watch?v=DGG9TGJ9tWc[/youtube]
It is so impressive that even Disney temp worker Josh Sobel thought it could have been “borrowed” from Disney animation but luckily Spiel Kind documented the entire process from modeling to rigging on a CG talk thread .
He breaks down the rig by explaining how many blend shapes went into the making of that rig:
“27 blendshapes, which I divided up and/or mirrored into 90 total shapes. On top of that I also have a joint-rig though, which is responsible for the jaw/lips- and eyelid-setup.”
The explanation on CGTalk is a bit more detailed:
“It’s made up of four rigs in total. The first is a joint-rig, which drives the eyelids, eyelashes and the jaw/lip setup. Marco Giordano’s eyelid setup has been a big help for this one. The zipper setup is built after Stefan Ehrenhaus’ instructions a few pages earlier in this thread.
The second one is a blendshape setup, which drives pretty much all expressive shapes. Been using some techniques from Jason Osipa’s book Stop Staring for this one.
Both of these feed into the third setup, which is another joint-rig with just a few joints with very broad weighting … basically a poor man’s lattice.
The fourth is the eyeball setup, which works independently from the rest and only drives two joints to which the eyeballs are skinned.”
and page 5 of the CGTalk’ thread he explains what his original idea was:
“The mouth is going to be driven by a joint-rig and a blendshape-rig. The joint-rig will open the jaw and provide freeform controls for lips, nose and cheeks. The blendshape-rig will contain wide, narrow, smile, frown, lip-roll out/in/tighten, mouth up/down/left/right, upper/lower lip-puff, cheek-puff and whatever cheek-puff’s opposite is called. Each shape will be broken down into at least lefts and rights. The lip-shapes will be broken down even more and divided among the joint-rig controls with some global ones above.”
Well I guess this will tie nicely with my previous article about mouth shapes!
Related posts:
You want to be a rigger huh (v2)
Mouth shapes Chester V
Mouth shapes – Chester V
Posted on July 11, 2016 |
7 Comments
Filed under Animation, Education, Modeling, Rigging
Don’t you find it frustrating every time you join a new project to find out you have only been provided with a pose library or worse, blend shapes that only contain random mouth shapes? Haven’t people ever seen the Preston Blair book?
Let’s make poorly thought out mouth shapes history!
Today I was doing a bit of cartoony animation research and came across that very enjoyable “Cloudy with a chance of Meatballs 2” behind the scene video featuring Chester V.
[youtube]https://www.youtube.com/watch?v=yWj0tGxGs_Q[/youtube]
The camera panned very quickly through Chester V’s mouth shape library but it gave me enough frames to reverse engineer it and make a nice pose library you should share with your modeler and rigger next time you get involved in pre-production. Sorry we couldn’t see the last mouth shapes but you get the idea.
On a side note, ideally those shouldn’t be blend shapes but shapes the mouth rig and controls allow you to create and smoothly transition from and out of to the next shapes. Simple per phonem blend shapes don’t allow for smooth transition and should be reserved for low cost animated tv series.
As you can see, the mouth shapes are divided in 3 emotions or groups: Happy, Neutral and Sad where the corners move vertically in conjunction with the teeth corners and for each emotion the animators are provided with 16 shapes derived from the Preston Blair simplified phonems: M(BP), S(DTNXK), E, I, L, A, O, TH, U(Q), and F(V).
Enjoy and feel free to share and print, the file is huge enough to please everyone! 😉
Related pots:
So you want to be a rigger huh?
“Messy goes to Okido” animation showreel
Posted on May 22, 2016 |
1 Comment
Filed under Animation, Portfolio
http://www.vimeo.com/166612959
That’s it, with the “Dizzy” episode having aired last week, my final showreel is here!!!!
A lot of lessons were learnt working on the production, some positive, some negative but I am really proud of the result. I think it looks very impressive considering it was Doodle Productions first TV series. I will be looking back at the lessons learnt in a following post but for now, I hope you will enjoy this great show I was privileged to work on few years ago.
Ah! and if you live in the UK and want to see more episodes, here is a link with the latest episodes
http://www.bbc.co.uk/cbeebies/shows/messy-goes-to-okido


Related posts:
“Messy goes to Okido” Lolly’s ice cream van
Hajimete no otsukai
Posted on March 14, 2016 |
Leave a Comment
Filed under Acting, Animation, Reference
Some time ago I was asked to animate kids and I know how different kids move compare to adults or teenager but I didn’t dare looking for references on Youtube and risking to be flagged by the Internet police 😉
Fear no more! I just found “Hajimete no otsukai” a great TV show featuring kids asked to run some errands for their parents while secret cameras are recording them 😉 Perfect reference!
Here is one video and you can find several episodes at the following link:
“Hajimete no otsukai” on Youtube
[youtube]https://www.youtube.com/watch?v=e5k5XTZy0rA[/youtube]

Ears motion
Posted on January 4, 2016 |
Leave a Comment
Filed under Acting, Education, Reference
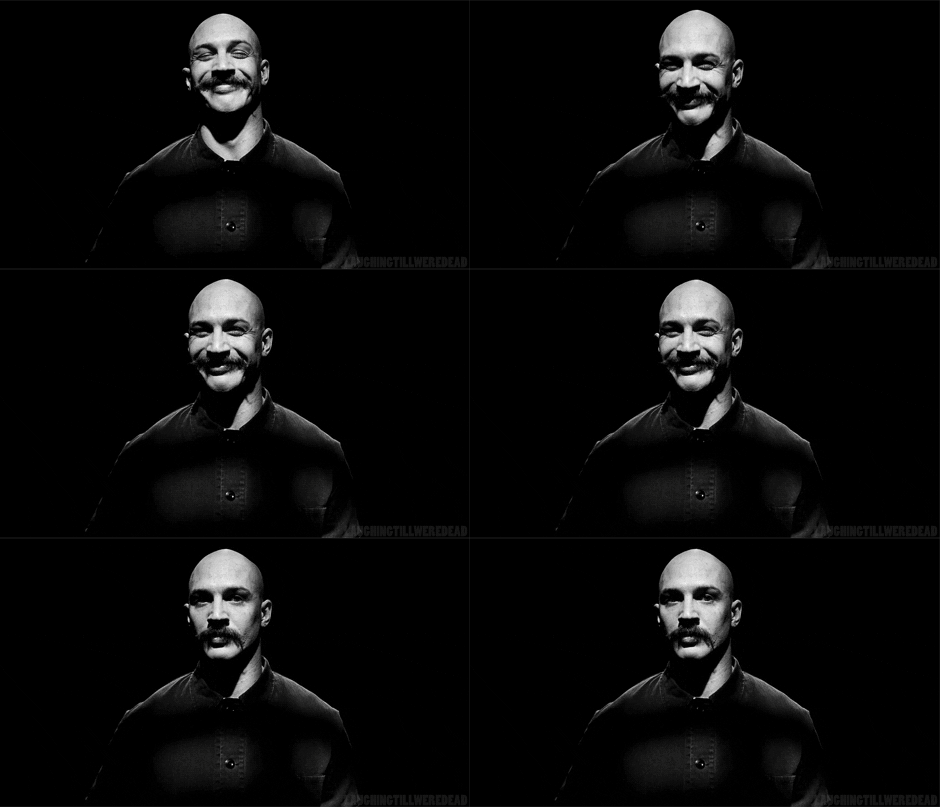
I had never seen such a good example of how much the ears can move up and down when the face stretches. We are talking about nearly 1 cm here!!!
So you want to be a rigger huh? v.02
Posted on January 3, 2016 |
10 Comments
Filed under Animation, Education, Rigging
[addons]
2018.10.01. v02.01 section 17 added relative to colourblindness
This is an updated version of a previous post I had written 5 years ago and that I think will still be very educational after having spent 5 more years in the industry.
If you want to become a rigger/character TD and even if you are already one, you might be interested to read the following notes, you will make animators’ life easier, allowing them to pull off better shots in the same amount of time or even quicker which will, in return, make the director and producers happy.
The same way it is important for a modeler to understand part of the rigging process, a rigger should also get a grasp of the animation workflow.
So how can you become a rigger that animators are happy to work with?
– Start with a good attitude, ask for feedback from the animators and embrace changes, be willing to discard that crazy automated function you thought would be really cool but animators find unusable when doing actual animation work. As Eamonn Butler put it when we visited Double Negative London in 2006, character TDs work for the animators, not the other way round and Disney often refers to Character TDs as stewards for the animation.
– Educate yourself and stay informed by reading rigging books and dvds, read blogs! Rigging Dojo is one of my favorite blogs, they keep posting remarquable interviews. Participate to public forums where you can interact with other professionals, check other rigs! Currently I am watching Josh Sobel tutorials, it is a set of tutorial where he explains how he made the adorable Kayla rig. Watch showreels and even students showreels! There has been instances where Interns or fresh graduates we hired were more knowledgeable than staff who had been at the company for years.
Personally, I have learnt rigging through several dvds and those should be compulsory for anyone wanting to become a good character TD so here they are:
Jason Schleifer “Animator Friendly Rigging”. That set will take few hours to go through but exposes the most important rigging concepts
Jason Schleifer “Maya Fast animation rigs”. The DVD is well over 5 years old and only 1h20 but still is a must for someone who want to be liked by his peers. Interestingly enough I just checked and Jason is now offering his educational material on a donation basis so you can pay what you think is fair.
Fahrenheit DVDs. I actually started with those which was really hardcore but that was a very good learning experience. I am not sure those are still available.
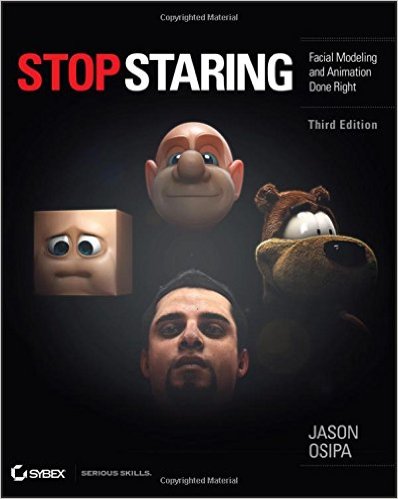
Jason Osipa “Stop starring, facial modeling and animation done right”. A new edition just came out and I should probably get that one too. Jason goes in length about facial rigging and you should definitely spend some time understanding what he is talking about.
You have ordered them all? Okay so while waiting for them, I want to mention few things that irritate seasoned animators when using a new rig:
1. Slow rigs. Rigs speed is the hot topic of 2015. Disney, in a talk given at Siggraph this year said the following: “Rig speed is of paramount importance to animation pipelines. Real-time performance provides immediate feedback to artists thereby increasing the number of possible iterations and ultimately leading to higher quality animation.”
Dreamworks and Pixar had already understood it and realtime performance was one of goal they have achieved with the recent release of Premo and Presto, their respective animation software last year. On their footsteps, Autodesk finally unlocked the full potential of modern computers with the Parallel Rig Evaluation toolset in Maya 2016. Maya users can now troubleshoot slowdowns and calculate mesh deformation and some deformers using all the CPU AND GPU cores present on a system, speeding up dramatically the framerate in Maya’s viewport. Make sure you read this previous article I wrote http://www.olivier-ladeuix.com/blog/2015/11/26/maya-monday-maya-2016-parallel-rig-evaluation/
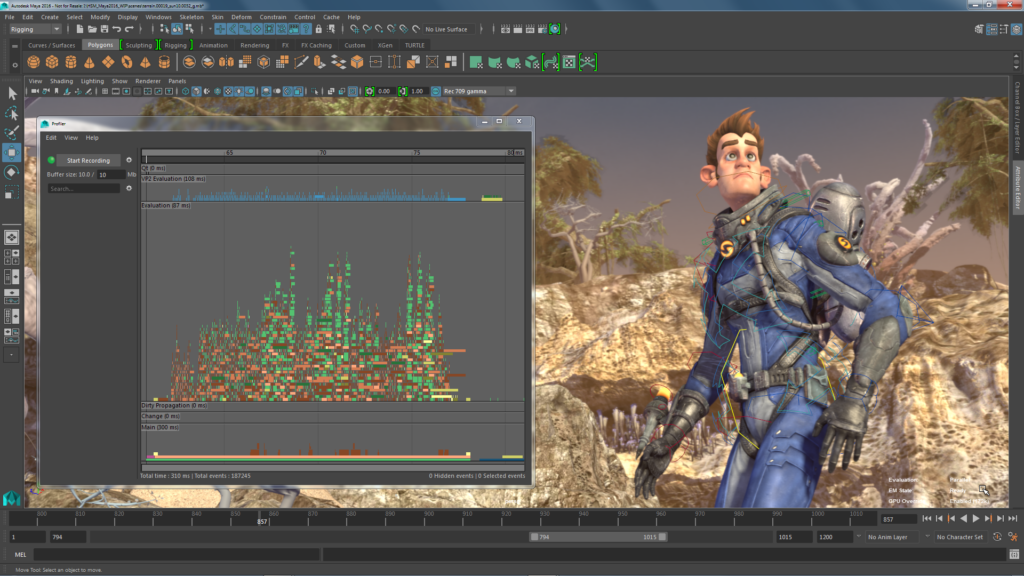
– If you are stuck with Maya 2015 and below, the old school method of speeding up rig involves replacing all expressions with nodes and create low poly or proxy version for the animators to work with. When working on body mechanics, animators don’t need the facial blend shapes or corrective shapes to be activated and when working on facial performance, body corrective blend shapes don’t need to be activated either, just a proxy version of the body to get an idea of the overall motion.
Disney Feature artist Sergi Caballer seems to have a nice feature where the animators can quickly isolate part of the body to speed up the rig. (read this great interview with Sergi on the Rigging Dojo website)
2. Rotation orders.
This is probably my biggest pet peeve. When creating your rig, pay special attention to rotation orders and use smart rotation orders for the limbs. By default Maya uses the default XYZ order, meaning that Z is carrying all the other axis so you want to stay away from this as often it is not the desirable order. In the situation of the head for example, it means that as soon as the animator will rotate the head in Y, X and Z will start to line up causing a gimbal lock and making it difficult for the animators to work in the graph editor. Instead by using ZXY or XZY, the lateral rotation of the head would never line up with the forward rotation. Jason Schleifer spends a chapter on rotation orders in his DVDs so please refer to it.
Recently I was made aware about a more efficient way to talk about rotation order that could possibly come from Dreamworks. Instead of talking in Greek letters like XYZ and since the orientation of controls could be different from one rig to an other, it would make more sense to talk in Bend, Side and Twist. When talking about the head for example, a bend would be the forward rotation of the head which is usually X, the side would be the tilting of the head to the right or the left which is usually Z and the twist would simply be the twist of the head usually associated to Y.
3. Consistent translation direction. (thanks Richie)
Animators need to be able to animate in the graph editor to troubleshoot problems or translate a character without using the global control so make sure your translations are consistent. If Y means up for the IK foot, it should also mean up for the hips and IK hands, same for X and Z.
4. GUIs As I am editing this paragraph 5 years later, it looks like Dreamworks is agreeing with me on that one so go and read: “Premo, the Dreamworks animation software“.
Personally I don’t like GUIs. Maya’s viewport is already so cluttered that I can’t see the point of having to keep looking sideway at an additional window covering, at best, a quarter of my screen when, controls could just be where they belong, on the surface of the geometry and toggled with a hotkey (alt +1 in the recent versions of Maya).
Most of the time an other quarter of the screen will be covered by the pose library leaving the user with hardly enough space for camera view, perspective view and graph editor.
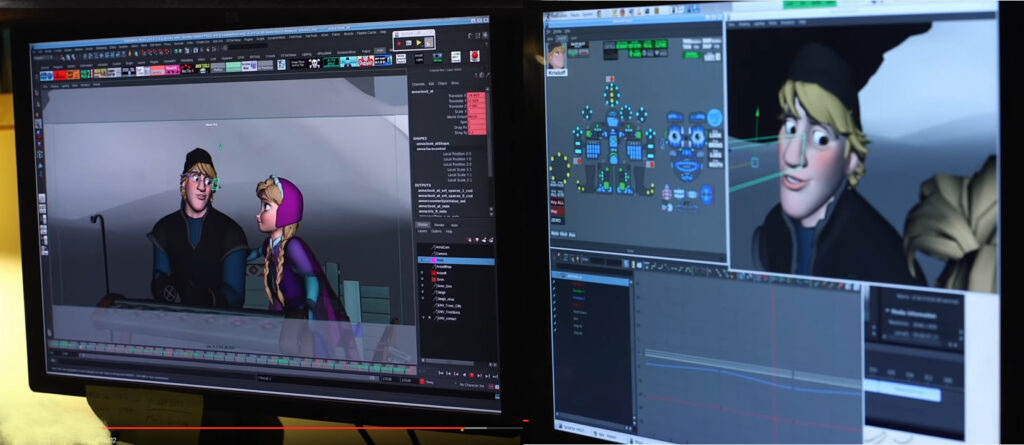
I tried an interesting concept a while back with a rig where instead of hitting the usual nurbs controls, you select an invisible polygon encompassing the surface of the limb. Keith Lango posted a similar setup a while ago using Zootrigger, myself I just parent constraint the Nurbs control or the joint to an invisible proxy box instead.
This could prove complex when selecting facial controls though so, fast forward to 2015, I just realised that Nurbs controls AND Geometry can be easily toggled through a script so animators don’t need GUIs as often, as long as the controls are streamlined and don’t overlap each others too much obviously (see point 9). I perfected few toggle scripts and I will share them with you in few days.
5. IF/FK switches WITH no-pop
It is obvious that animators need IK and FK for legs and hands but you should also consider a script that would allow the animators to switch very easily from IK to FK and reverse without going back to the T pose. Some people call this IK snap, IK match. A script was provided with the goold old Norman rig to do that kind of thing

6. Elbow and Knee lock. The animators should be able to lock an elbow to a table
7. Scaling Rigs should be scalable! Numerous time I ran into situations where we needed to scale the rigs and the rigs didn’t allow for this.
8. World orient/local orient switches for head, spine, arms …. Animators should be able to switch the alignment of the FK Head, neck, arms to the world or their parent by default and ideally a tool should allow to switch the parent space on the fly.
9. Bend bow and noddle arms. I am liking this a lot as it helps to make the rig look more organic or more cartoony in the case of noodel arms as seen below.
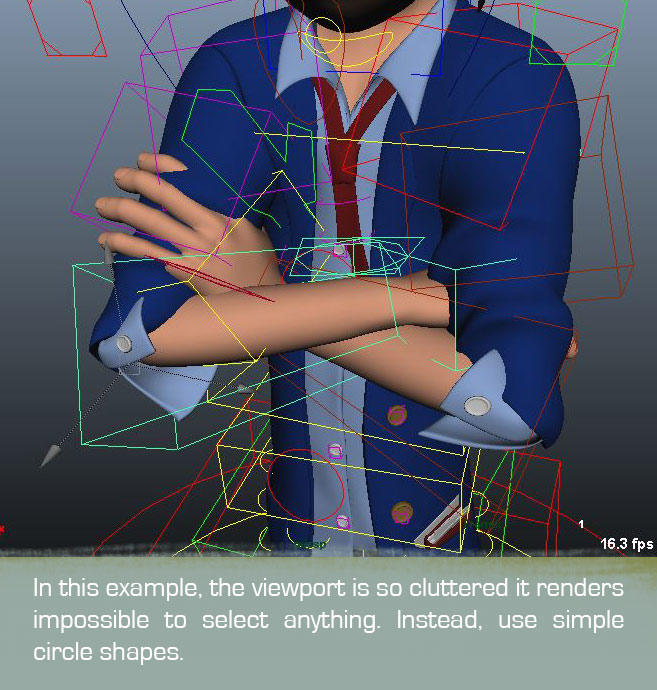
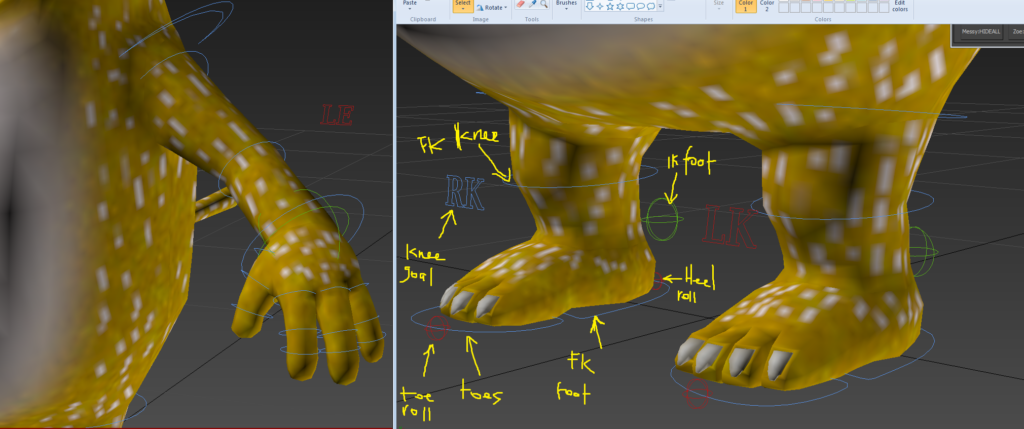
10. Cluttered viewports. Nurbs controls don’t need to cover the entire model, make them clean and simple, if possible make them invisible (cf GUI). A simple circle is more than enough for selecting controls, no need of an entire box shape especially for fingers or arms that will irremediably start overlapping and rendering impossible to select anything.
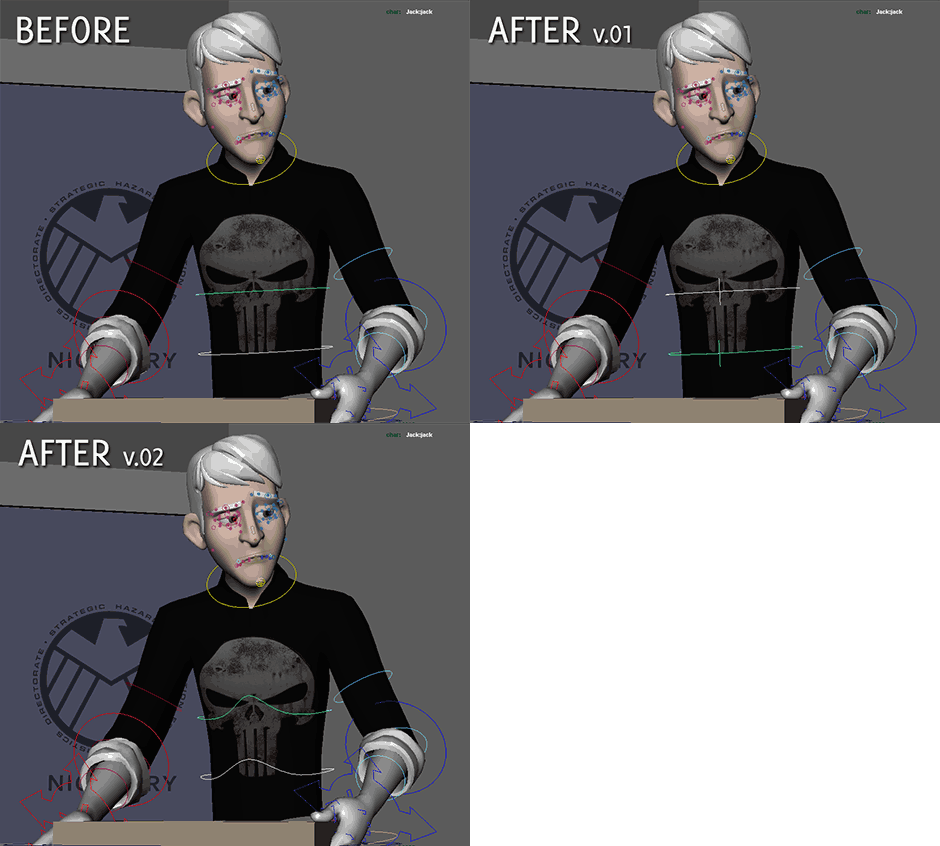
As a side note, when using circles for the fk spine, try to add an indentation at the front and back of the circle just to be able to quickly assess the offset of the spine controls. I normally take the center vertex of the nurbs circle and shift it up a bit then adjust the bezier curves like below.
11. Non consistency in the control’s boolean channel. In boolean operations, 0 should mean “No” and 1 should mean “Yes”. ie Shoulder parent 0 should mean that the IK hand is not parented to the shoulder. You could actually do the opposite, but as long as it it consistent throughout the rig.
12. Set me free. Animators are artists and they might want to break an elbow, pull fingers to create smear frames, pull the lips much higher that reality would suggest in order to stylise the motion so don’t restrain the animators to what is anatomically possible, unless you want them to come up with really stiff animation.
13. Pole vector switches. Pole vector should be centered right in front of the knees or elbow, not closer to one or the other joint and they should have a switch to the world just so they don’t follow the orientation of the foot or IK hand at all time.
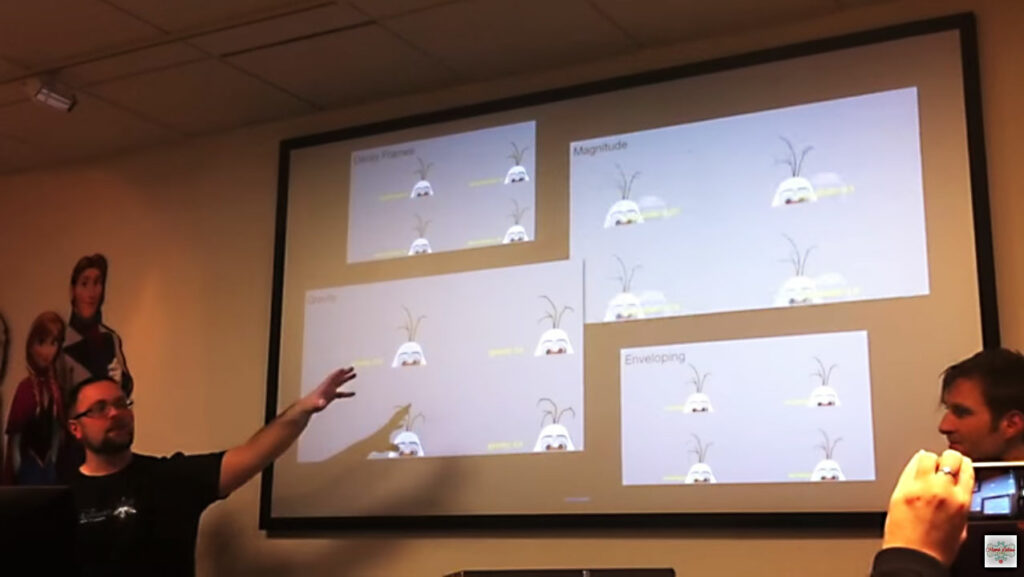
14. Automated overlap/bakeable simulation. Automated overlaps for secondary elements can add so much life to a rig without the animator to do much work. Think about little appendages like ears, tails, ponytails, little bit of clothing or foot straps in the case of the following Disney demo however, animators should ultimately be able to make changes to the automated result which is why the joints animation should be bakeable.
On “Messy goes to Okido”, I would first pose Messy’s tail in it’s trademark curled pose, then ran a script to simulate overlaps and would finally created a motion based on a blending of the two. This gave a life like feel that was still designed.
15. Autorigs/programming. In production nowadays, there isn’t much room for a TD to rig all the characters from scratch by hand and this is not scalable for bigger teams so most large companies have their own autorigs and smaller one rely on off the shelf autorigs like mGear or Advanced Skeleton so you might want to get used to the latter unless you join a bigger company that will have their own workflow.
When I worked at EA I had to work on several prototype games and autorigs are what offered us the ultra quick turnaround required. Rigging and skinning were so fast that we were able to start animating the same day instead of relying on weekly turnarounds. I have been a long time advocate of the abAutorig so click the link below to see how autorigs work.
16. Pose and animation libraries. In production it is paramount for the rigs to be compatible with standard pose and animation library scripts like Kurt Rathjen’s Studio Library, Lionel Gallat’s PoseLib, or the very user friendly Sal Pose Manager by Salwan Badra for 3dsmax. Pose libraries allow the animators to work with extremely complex rigs and stay “on model” which is very important when hiring junior staff and a time saver for senior animators. Believe it or not, I have worked in TV productions where the rigs weren’t compatible with those scripts and animators had to waste an incredible amount of time recreating some poses or animation from scratch and often this meant they didn’t bother.
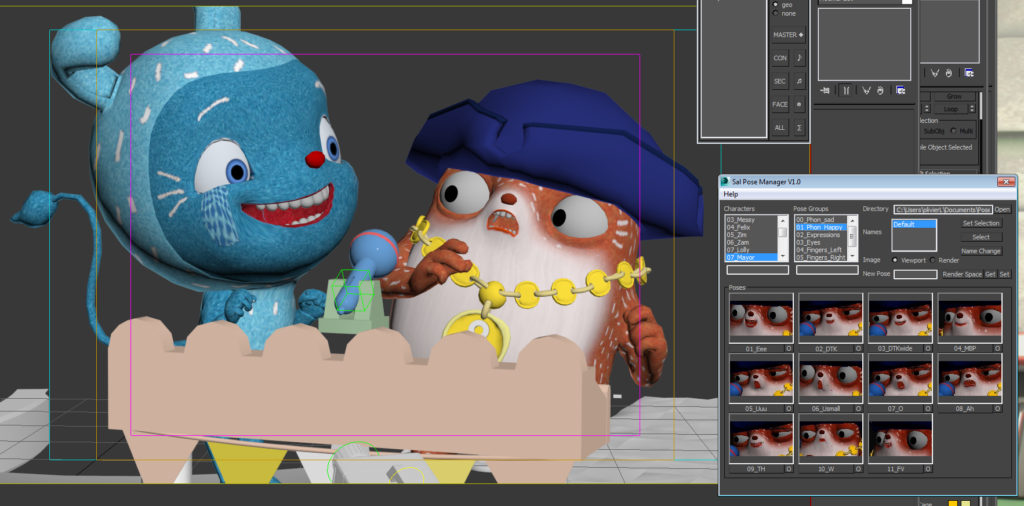
At AnimSquad which is often referred to as the Disney animation school since most teachers are Disney Animation Studios supervisors, we had a pose library that separated poses for when the character’s head was facing the camera, looking screen right or looking screen left as you normally use every single tertiary control to cheat the pose so it looks appealing from every angle.
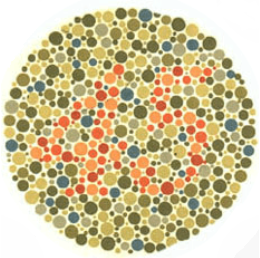
17. Controllers colours and colour blindness. 1 in 10 men and 1 in 200 women are affected by colour blindness. For most, green is a difficult colour to see so refrain from using the red/green or green/yellow combination. Instead you should favour colours that are widely contrasting like red and blue for example. I know it looks pretty ugly in term of colour harmony but rigs primary goal is to be efficient, not pretty. If you don’t know if you are colour blind, test your sight here, personally I am moderate colourblind and can’t see half of the plates http://www.color-blindness.com/ishihara-38-plates-cvd-test/#prettyPhoto.
Alright, that’s it for now and as a treat for making it so far, check out some really cool rigging showreels and “making-of” videos to get an additional creative boost:
Related posts:
Pixar animation software part 1
Pixar animation software part 2
Premo, the Dreamworks animation software
Kaelou
Rob and Ron by Tumblehead
ESMA
World orient Head and shoulder
Norman World Align spine
Looney tunes shorts online
Have fun rigging!
Maya Monday – Maya 2016 parallel rig evaluation
Posted on November 26, 2015 |
2 Comments
Filed under Animation, Education, Rigging
3dsmax TD have become increasingly envious with the release of Maya 2016 and the parallel rig evaluation toolkit allowing Maya TDs to finally use all the CPUs and GPUs cores in parallel, in order to speed up the viewport display but until now I hadn’t see such a thorough demonstration as the following one.
Have a look it is really interesting for both TDs and animators as they give some really good tips on how to speed up rigs for animators. Also, have a look at the related Rigging Dojo article which is pretty funny:
http://www.riggingdojo.com/2015/10/22/blazing-fast-character-rigs-with-maya-2016/
and here one new article from Autodesk
http://download.autodesk.com/us/company/files/2018/UsingParallelMaya.html#overview
I can’t wait to use Maya 2016 in production!
[youtube]https://www.youtube.com/watch?v=UJFTPDYLHV4[/youtube]
Have you ever been tempted to use…?
Posted on November 25, 2015 |
Leave a Comment
Filed under Animation, Education, Fun
I was watching this today and couldn’t resist highlighting the following. I could watch this in loop so I made this a loop! 😉
[youtube]https://www.youtube.com/watch?v=xb6PY4le_5g[/youtube]
More seriously, I am depicting the situation as being black or white at Disney when the reality is far more complex.
Some movies like Pirates of the Caribbean are well known to rely heavily on motion capture and Disney research has published several papers featuring attempts to replace keyframe animators. The following one is particularly chilling as they are trying to prove how human motion capture can even be used to animate Non-Humanoid Characters with Human Motion Data using Pixar’s Luxo as an example. If someone called this blasphemy I would probably agree…..
http://www.disneyresearch.com/project/animating-non-humanoid-characters-with-human-motion-data/

Academy Creative Spark: Simon Otto
Posted on November 23, 2015 |
Leave a Comment
Filed under Animation
[youtube]https://www.youtube.com/watch?v=aNvXFz1tsF4[/youtube]
Academy Originals just posted an inspirational video interview with Dreamworks Head of Character Animation Simon Otto which in the Dreamworks lingo would probably translate into HTTYD HOCA 😉 (click above for the video)
As a fine art hobbyist and compulsory doodlers I couldn’t help smiling throughout.
“Animator Simon Otto (“How to Train Your Dragon”, “How to Train Your Dragon 2”, “Kung Fu Panda”) takes viewers inside his creative process in an exploration of where ideas come from”


Related post:
Premo, the Dreamworks animation software
“Messy goes to Okido”. Lolly’s Ice Cream van (environment rigging)
Posted on November 21, 2015 |
1 Comment
Filed under Animation, Character design, Comics, Education, Portfolio
[vimeo]http://vimeo.com/138861480[/vimeo]
At the begining of Messy goes to Okido”‘s production, our TD needed some help to rig various props and environment so I gave him a hand for few weeks and mostly for the “Taste buddies” episode. I never got credits for this but I don’t care much since I don’t really want to advertise those skills too much. I am an animator and don’t want to land rigging jobs.
Among those props was the rigging of Lolly’s Ice cream van which was a lot of fun.
It was a bit of challenge as I hadn’t done that kind of stuff in Max for a very long time but at the end of the day it didn’t take too long since I was able to use the exact same techniques I would have used in Maya. I could have spend a bit more time on some areas but TV series require a really fast turnaround unfortunately so the entire rig had to be done and tested in less than two weeks I think I remember.
If you live in UK, you can see the rig in action on the BBC Iplayer right here:
bbc.co.uk/iplayer/cbeebies/episode/b069r3gk/messy-goes-to-okido-4-tastebuddies
Enjoy!

