
Brussels get a make over
Posted on March 19, 2007 |
Leave a Comment
Filed under Animation Mentor, Portfolio
I started customizing one of the AM rigs today.
Brussels got a make over from head to toes using my newly acquired photoshop painting skills. Haircut and hears based on Jure Prek’s designs, modeled in 3dsmax and imported as an .obj file.
I am hoping to find the time to work on Bishop as quickly as possible.

You will notice some stretching around the waist area. This is due to the original UVmaps coming with Brussels. I will have to redo the UVs sometimes.
410 blocking+
Posted on March 19, 2007 |
1 Comment
Filed under Animation Mentor
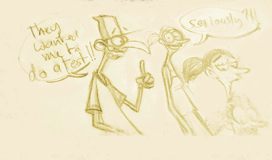
Here is where I am with 2 characters shot. I still have a some keys to put here and there especially where Bishop goes monologuing then create my eases and time out the whole thing but I am hoping to start splining tomorrow and be on time to deliver a polished version by the end of the week or as a late assignment next week.
The shot is meant to be delivered on sunday this week.

Potapych: The Bear Who Loved Vodka
Posted on March 18, 2007 |
2 Comments
Filed under Animation
This is an animation based on a story that ran in the Russian newspapers few years ago.
Potapych the story of a domesticated drunken bear

Nice story, some nice little animation details and a great rendering.
Refreshing and entertaining
Les soeurs jumelles
Posted on March 16, 2007 |
1 Comment
Filed under Drawings, Portfolio, Tablet PC

I couldn’t find sleep this morning and after a very early wake up 4am started drawing on my tabletPC. By the way, Sketchbook rocks. First because the sketching feeling is amaaazzzziiingg even with a 7 years old wacom UltraPad pen and second because the CPU use on my HP 4200 is a stable 20% which is great for the battery life when you are having a coffee at Starbucks.
Because of the wide array of customizable brushes Photoshop CS2 is excellent but the CPU use goes up to 100% which triggers the CPU fan too frequently for my liking.

How about a pickle?
Posted on March 15, 2007 |
1 Comment
Filed under Animation Mentor, Miscellaneous

Animation mentor winter 2007 showreel is finally out! Congratulation to all my fellow students who made it. some truely inspiring work here.
The highlights would be in no particular order Jure Prek, Brandon Beckstead, Dan “the Dan” Barker, Mike Stern, Eric Lutha, Deter Brown, Peter Devlin and my ex classmates Ales Mav, Maciek Gliwa, Kickboxer Larisa Kotnik 😉
Some of them have already found employment in big studios and that’s well deserved!

AM Rachel Ito did an amazing work on lighting some of the best shots.
Rooster
Posted on March 8, 2007 |
2 Comments
Filed under Drawings, Portfolio
this week’s AM drawing topic is the chineese horoscope. I chose the rooster.
First experiment with various sort of brushes, some more successful than others.

Photoshop. Wacom tablet.
Compositing and render passes
Posted on March 4, 2007 |
2 Comments
Filed under Miscellaneous
I was talking to my friend Mental Ray beta tester Jamie Cardoso lately, and realised that he was rendering his visualisations in single passes.
People who are not involved in rendering might not see the point but you need to think that if it takes you 5 hours to do a render and you realise that the Global illumination is too strong or the colours are too bright then you will have to do few more 5 hours renders until you get it right.
Ok you can always render a small area of your visualisation but if it is not you but the client who is not happy about the render and he needs to see the 8 pictures you have been asked to do every time you submit stuff for approval, then you are in real trouble.
Max and Combustion offer a great way to work in passes but you need to learn combustion and that can be really daunting task. Combustion to me is a bit like the Zbrush of compositing. Great when you know it, horrible when you open it for the first time. Well that’s when you compare it to After Effect, Shake is just as confusing.

So what does this leaves you with? Cebas PSD Manager is only $172 and allows you to export your passes straight into Photoshop. Each pass goes into the correct transfer mode.
Unlike Combustion, working on videos would be a real pain. Now there is an other way and that one doesn’t requires any plugins. Mental Ray!
By default mental ray allows you to render passes but the problem is, how do you transfer them into photoshop? I didn’t actually read the mental ray manual since I am not too keen on that rendering engine so I looked for answers elsewhere and found them in the Max to Combustion workflow. Here is how you do it:
“The Background layer uses the Normal transfer mode
The Diffuse layer is directly above the Background layer, it is composited using the Normal transfer mode.
The Specular layer is composited using the Add transfer mode. The Self-Illumination, Refraction, and Reflection render element layers are also composited using the Add transfer mode.
The Shadow layer is composited above the Specular layer to dim color in the shadowed areas. By default, the Shadow layer uses Normal transfer mode because its alpha channel controls how much the black and white shadows dim the Specular and Diffuse layers beneath it in the stacking order.
For the composite to match the 3ds Max scene, the Shadow layer must be below the Reflection, Refraction, and Self-Illumination layers. Otherwise, these three layers would also be dimmed.
If the composite has an Atmosphere layer, the layer appears above the Self-Illumination layer. The Atmosphere layer must be composited over all the other layers that are turned on. The Atmosphere layer uses the Normal transfer mode.
By default, the Alpha layer is turned off because it is not required, but it is very useful for compositing additional layers. The Z Depth and Blend render elements are also not required for a composite, so the layers are turned off in the composite when these elements are rendered in 3ds Max.”
Autodesk owns the copyrights of the extract above, I hope they won’t give me any problem. Come on guys I am making your softwares more popular!
The entire content is in the Combustion manual, in the last chapter called:
Combustion and 3dsmax>using render elements>Transfer modes and stacking order.
Victor Navone on Splinophilia
Posted on March 2, 2007 |
Leave a Comment
Filed under Animation

Pixar Senior Animator Victor Navone talks about Splinophilia this week on his blog.
More often animators find themselves working against the Graph editor instead of working with it. Victor talks about how he handles it and believe me, the guy knows what he is talking about. We had a 4 hours lecture with him few weeks back and I was amazed to see how easily he navigates through the “spaghetti box” and pretty much animates in the graph editor.
Brad Bird’s animator interview
Posted on March 2, 2007 |
Leave a Comment
Filed under Animation
Brad Bird is a great director and story teller but I am a bit sick of his director’s interviews now.
Rejoy! Splinedoctors uploaded a great Podcast where Brad talks about his character animation career.
You probably didn’t know that but he was already working at Disney few years before CalArt. In fact he got his first desk at Disney aged 14. Yes, he is mister Incredible!

2 characters shot blocking+ and Bishop facial
Posted on March 2, 2007 |
Leave a Comment
Filed under Animation Mentor
I went ahead and did the blocking + of the last shot this week. The props were modeled last week.

Just to pretend I have a deep knowledge in cinema, I took reference in Eisenstein’s “Ivan the terrible” and Kubrik’s “The shining” for my Bishop facial poses this week.


-
Search
-
-
Links (mostly outdated)
- A Commentary
- Alberto Cerriteno
- Alfo S.
- Alison
- Andrea Blasich
- Andy Thomas
- Animation archive
- Animation mentor
- Anna Yamazoe
- Arte y Animación.
- Asifa Hollywood
- Avalanche Software
- Big Screen Animation blog
- Bobby Chiu
- Bonvoyage airlines - Bonvoyage airlines webdesign agency
- Box Office Mojo
- Brad Kinley
- Brandon Beckstead
- Brock Gallagher
- Brock-O-Rama
- Carmelo
- Cartoon Brew
- CGIndia
- Chad Sellers
- Char Blarg blog
- Character animation studio
- Character design blog
- Character design notes
- Chicken Toast
- Chris Davis
- Chronicles of an animator - David Martinez blog
- Conceptart.org - messy forum as usual but you can find some gems
- Deja View
- DJ - He is not a real DJ but that’s his name anyway
- DMCA
- DNA guys
- Drawn
- Enrico Casarosa
- Erlend
- FEED
- Feng Zhu
- Florian Satzinger
- Framefilter
- fxguide
- Golgoth13
- Henry Sanchez
- Jamaal Bradley
- Jason Schleifer
- JimHillMedia
- John K - this is not John Khars here but Ren and Stimpy John Kricfalusi. I am not too fan of the cartoon but
- Joost
- Keith Lango
- Kenny Roy
- Kris Staber
- Kris Staber
- leif jeffers
- Lines and colors
- Maciek Gliwa
- Manfred Ragossnig
- Mark Behm
- Martin K
- Matt Williames
- Mayerson on Animation
- Micha
- MichaelBarrier.com
- Mike Stern
- Milo
- Morgan Kelly
- Nikola Tamindzic - Party photographer
- Passion Pictures
- Peer Lemmers
- Rad How To
- Ray Chase
- Rebecca's blog
- Richie Prado
- Robert Barros
- Rok Andic
- Ross Burt
- Saddington & Baynes
- Sebastien Lasserre
- Spline Bomb
- Spline doctors - They are not really doctors but they will help you cure all your spline problems
- Spungella - Jean Denis Haas blog
- Stephen Silver
- Studio AKA
- Studio Soi
- Subdivision modeling
- Syndicat des producteurs de films d'animation newsletter
- TAG blog
- the A files
- The Art Center
- The art of Dave Pimentel
- The Berzerker
- The CA Blog
- the Plausible Impossible
- Timbo
- Timbo
- Toby Shelton - Dreamworks storyboard artist
- TWEAK!
- Uli Meyer
- Vincil
- Visual news
- Vulcan studios
- Wesley Louis
- WireImage
- Zbrush central
- Ziggy
