Posted on January 14, 2012 |
4 Comments
Filed under Education, Modeling, Portfolio
Since animation work is pretty scarce at the moment I have decided to put all my modeling work together just so I can apply to 3d modeling positions.
Those are props for a long overdue short film, personal work, professional work and character design studies. The work was done in Maya 2009 for the most recent pieces, 3ds Max 5 for the rest.
The Pixar related models are obviously fan art as I have never worked on Ratatouille or Brave. I only did those to get a better understanding of Pixar’s character designs, wireframe edge flow and rigging (articulations).
During a recent visit to French sculptor Bourdelle’s museum in Paris, I was reminded it is how the best artists learnt their art, by copying the masters. Michaelangelo was a great source of inspiration for Bourdelle, Daniel Lopez Munoz is mine.
Download the PDF version if you prefer Olivier_Ladeuix_modeling_2011.pdf or click the pictures below to zoom in.
You will probably find a timelapse video for most pieces in the “Related Posts” section at the end of the post and I would suggest their viewing to anyone wanting to learn about CG modeling and clean edge flow or just to see wireframes.


Related posts:
Low polygon modeling
Fredericksen house part 02
Long chair modeling timelapse
Posted on October 28, 2011 |
7 Comments
Filed under Education, Modeling
Low polygon modelling, opposed to “high frequency modeling” (the stuff done in Zbrush or Mudbox), is the basics of modelling. Any software can handle that type of work nowadays, from the free Blender to the extremely expensive Maya, 3dsmax or XSI packages.
There are two approaches to low polygon modeling:
1. A top-down approach where you start directly with a square plane whose edges you extrude following the final edge loops.
2. A bottom-up approach where you start modeling from a cube that you gradually subdivide by adding edges or extruding faces.
Both techniques are so simple that they only require a subdivide toggling hotkey (3 in Maya) and a handful of tools which I featured in my ‘Low Polygon modeling tools’ post.
The Edge extrusion method was extensively demonstrated by Kolby Jukes back in the days he used XSI as his primary modeling software. All his videos are offline as he only does Mudbox “High frequency sculpting” nowadays but the Edge extrusion technique is the technique I featured in my latest modeling timelaps video based on Brave’s Lord Macintosh character so have a look at this:
[vimeo]http://vimeo.com/25620952[/vimeo]
If you are not familiar with modeling, what I did here was to put the original concept art on a plane in the background then create a second smaller plane whose edges I extruded following an edge flow mental picture I had. The edge flow being the minimum amount of flowing edges necessary to describe the muscles, skeletal structure or deformation of the surface. Whaooo that was complicated! Well instead of just projecting a grid of edges on the surface of the head, I am creating a minimal amount of edge loops and rings that follow the creases facial expressions will produce. Makes sense?
Bay Raitt was probably the first one to fully demonstrate the Cube approach in that ground breaking 1999 “One afternoon with Bay Raitt” Mirai timelapse video.
This is the one I used in my Rickshaw modeling timelapse video:
[vimeo]http://vimeo.com/6857488[/vimeo]
[vimeo]http://vimeo.com/6825067[/vimeo]
I think the video is self explanatory, if not, post a comment and I will add more explanation in my post
Related posts:
Pixar “Brave” concept art and teaser
Jason Schleifer interview – Speaking of animation
Posts in the Modeling category
Posted on June 29, 2011 |
12 Comments
Filed under Animation, Character design, Modeling
[youtube]http://www.youtube.com/watch?v=tYg0VgPy6Uk[/youtube]
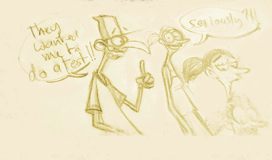
Pixar just released a teaser for next years feature Brave (previously titled The Bear and the Bow) along with some character designs.

Those designs have definitely a Pixar feel to them as they immediately remind us of The Incredibles or Up. Some commentators compared Lord Macintosh to Muntz and the Wise Woman to a Carl Fredericksen in drag 🙂
My favourite are actually Lord Macintosh and the Wise Woman as they are much more graphic than the other character. As a matter of fact I have decided to model those two in order to better understand the Pixar style and improve my modeling skills.

Updated version after the release of the movie
I modelled Lord Macintosh in Maya starting from a plane and using the edge extrusion technique in order to quickly create some edge loops then refined the base shape by cutting faces, merging and moving vertices around. Nothing too fancy. I have some experience with that type of modelling but I think I will try the Zbrush approach for the Wise Woman. My friend Richie just showed me the work of Tom Parker, an incredible Zbrush modeler that can knock out a piece in less than two hours.
Here is the timelapse, I only recorded the first few hours as the final “vertex cleaning/edge rerouting” pass is too tedious to watch. I hope you will find this interesting, the video is a sequence of automated screenshots hence the choppiness.
[vimeo]http://vimeo.com/25620952[/vimeo]
via http://www.cartoonbrew.com/pixar/brave-characters.html
Related posts:
Lord Macintosh update
Modeling blog category
Posted on March 5, 2011 |
3 Comments
Filed under Animation, Character design, Modeling
I CAN’T WAIT!!!!!
[youtube]http://www.youtube.com/watch?v=opJDglqiQ6k[/youtube]
and something I just found. A top french modeler took one of Nico Marlet undone designs and modeled a nasty croco. Actually, judging by the colour scheme, it could be a good guy.
I have a fascination for cartoony crocos I have to say. We have a pretty cool one in the show I am working on (sorry can’t show) but his facial rig doesn’t allow for broad expressions. I will have to investigate how to rig cartoony beaks and long jaw one of those days. Ah for the story, Michel Guillemain is now at Dreamworks LA on … Kung Fu Panda 2 😉
[vimeo]http://vimeo.com/12269548[/vimeo]
ah some interesting links. Yes I have the bad feeling they only took the first story and put a 2 at the end, in the line of the Die Hard series, hopefully it is not just the overcoming of a new enemy.
on writing for Kung Fu Panda
Nicolas Marlet interview
Posted on May 23, 2010 |
4 Comments
Filed under Education, Modeling, Portfolio
Here is where I am today. Only spent one hour on this. The weather was way too nice to stay home today.
I mainly worked on the windows and some detailing work. I added some basic colours and did a quick mental ray rendering just for giggles, nothing too elaborate.
The shingles will be modelled at the latest stage, I still have a major issue with the roof proportions to solve. Don Shank blueprints are very useful but the final model seems a bit different.
Click on the pic for bigger version

and here is the timelapse, 6 hours of work in 12 minutes.
[vimeo]http://vimeo.com/11983854[/vimeo]
Related post:
Fredricksen house part 01
Posted on May 22, 2010 |
1 Comment
Filed under Education, Modeling, Portfolio
I saw this yesterday and thought it would be fun to model it over the week end….
I didn’t think it would take so long but this is where I am 5 hours later. Click on the picture for a bigger version.

If you are interested, I have also recorded a timelapse video as usual and will post it when done with the modeling tomorrow.
Posted on April 3, 2010 |
1 Comment
Filed under Education, Modeling, Portfolio, Short film
What are you supposed to do on Easter bank holiday, work on your short film right?
Here is a series of timelapse video where you can follow me modeling one of the main props for my short film.
[vimeo]http://vimeo.com/10620178[/vimeo]
[vimeo]http://vimeo.com/10629348[/vimeo]
[vimeo]http://vimeo.com/10642272[/vimeo]
[vimeo]http://vimeo.com/10649139[/vimeo]
Today I am gonna tackle the cartoony rigging of this guy so it ties a bit better with shot 12. I am keeping in mind to make the props looks a bit more wonkey but the rig could help for that.
Related post:
Short film blog category
Shot 12 final
Props done

Posted on March 4, 2010 |
3 Comments
Filed under Animation, Modeling, Portfolio
[vimeo]http://vimeo.com/9936173[/vimeo]
This time I am modeling the hands. I am not looking at references yet, just blocking out the shapes.
You will see me starting from a cube, which I subdivide manually to extrude faces and create the fingers.
I push the details on one fingers then duplicate it to create the other ones. Very often you will see me going from low poly to high poly using the 1 and 3 keys in maya 2009.
and here is the second pass
[vimeo]http://vimeo.com/9924238[/vimeo]
Third pass, refining the shape, cleaning up some edges, adding more detail
[youtube]http://www.youtube.com/watch?v=RNHxU-TFHSM[/youtube]

Related posts:
Autorig tutorial prep work 03
Autorig tutorial prep work 02
Autorig tutorial prep work 01
Low polygon modeling tools
Posted on February 28, 2010 |
4 Comments
Filed under Animation, Modeling, Portfolio

Here is the nearly final model. Click on the picture for full screen version.
I will work on the hands tomorrow.I am still not entirely happy about the junction between the chin and the cheek bone, the eye/nose area also need a bit more work but that should be enough for the Autorig tutorial.
Related posts:
Autorig tutorial prep work 02
Autorig tutorial prep work 01
Low polygon modeling tools
Posted on February 27, 2010 |
6 Comments
Filed under Animation, Modeling, Portfolio
[vimeo]http://vimeo.com/9780845[/vimeo]
Here is a video showing the modeling process for my tribute to Pixar’s “Up”.
You can double click to see the video in Full screen but if you first click on the Vimeo logo you will be able to see it in full 1600×1200. You might also be able to download the video from Vimeo, it is in Xvid/Divx, sorry I don’t have Quicktime pro but Virtual Dub or KMplayer allow you to go frame by frame if needed.
[…] Read more