I don’t play games much those days but it is the second time I am posting about Overwatch as they are doing all the right things to me at the moment!
Great animation, great behind the scenes, sharing knowledge and upping the game! Thanks Blizzard!
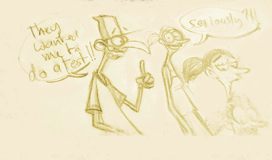
Today is an exceptional free 1 hour behind the scenes about Overwatch’s animated shorts. Look at those rigs, definitely on par with the ones from animated features or even the Kayla rig since I am studying that one at the moment.
And few stills from the talk followed by one of the animated shorts “the Last Bastion” (gorgeous):
Youtube user Spiel Kind is sharing a walkthrough of his impressive fan made Frozen’s Elsa rig.
[youtube]http://www.youtube.com/watch?v=DGG9TGJ9tWc[/youtube]
It is so impressive that even Disney temp worker Josh Sobel thought it could have been “borrowed” from Disney animation but luckily Spiel Kind documented the entire process from modeling to rigging on a CG talk thread .
He breaks down the rig by explaining how many blend shapes went into the making of that rig:
“27 blendshapes, which I divided up and/or mirrored into 90 total shapes. On top of that I also have a joint-rig though, which is responsible for the jaw/lips- and eyelid-setup.”
The explanation on CGTalk is a bit more detailed:
“It’s made up of four rigs in total. The first is a joint-rig, which drives the eyelids, eyelashes and the jaw/lip setup. Marco Giordano’s eyelid setup has been a big help for this one. The zipper setup is built after Stefan Ehrenhaus’ instructions a few pages earlier in this thread.
The second one is a blendshape setup, which drives pretty much all expressive shapes. Been using some techniques from Jason Osipa’s book Stop Staring for this one.
Both of these feed into the third setup, which is another joint-rig with just a few joints with very broad weighting … basically a poor man’s lattice.
The fourth is the eyeball setup, which works independently from the rest and only drives two joints to which the eyeballs are skinned.”
and page 5 of the CGTalk’ thread he explains what his original idea was:
“The mouth is going to be driven by a joint-rig and a blendshape-rig. The joint-rig will open the jaw and provide freeform controls for lips, nose and cheeks. The blendshape-rig will contain wide, narrow, smile, frown, lip-roll out/in/tighten, mouth up/down/left/right, upper/lower lip-puff, cheek-puff and whatever cheek-puff’s opposite is called. Each shape will be broken down into at least lefts and rights. The lip-shapes will be broken down even more and divided among the joint-rig controls with some global ones above.”
Well I guess this will tie nicely with my previous article about mouth shapes!
Don’t you find it frustrating every time you join a new project to find out you have only been provided with a pose library or worse, blend shapes that only contain random mouth shapes? Haven’t people ever seen the Preston Blair book?
Let’s make poorly thought out mouth shapes history!
Today I was doing a bit of cartoony animation research and came across that very enjoyable “Cloudy with a chance of Meatballs 2” behind the scene video featuring Chester V.
The camera panned very quickly through Chester V’s mouth shape library but it gave me enough frames to reverse engineer it and make a nice pose library you should share with your modeler and rigger next time you get involved in pre-production. Sorry we couldn’t see the last mouth shapes but you get the idea.
On a side note, ideally those shouldn’t be blend shapes but shapes the mouth rig and controls allow you to create and smoothly transition from and out of to the next shapes. Simple per phonem blend shapes don’t allow for smooth transition and should be reserved for low cost animated tv series.
As you can see, the mouth shapes are divided in 3 emotions or groups: Happy, Neutral and Sad where the corners move vertically in conjunction with the teeth corners and for each emotion the animators are provided with 16 shapes derived from the Preston Blair simplified phonems: M(BP), S(DTNXK), E, I, L, A, O, TH, U(Q), and F(V).
Enjoy and feel free to share and print, the file is huge enough to please everyone! 😉
Have you ever seen wireframes of a Pixar character model or even a Pixar modeler’s demo reel ? Me neither, but that was until today!
Thanks to the recent adoption of Pinterest by animation enthusiasts, I just found the modeling showreel of Jonathan Paine, a fine modeler/sculptor who has worked on some of our beloved Pixar animated short films and features like Boundin’, One man band, Ratatouille, Cars, Up and also Blue Sky’s greatest IP : Ice Age.
If like me you have an obsession for polygon wireframes and naked meshes, head over to Vimeo to enjoy a great display of skills.
I had already modeled Brave’s Lord Macintosh last year but working from a single concept art proved to be really tricky and I completely missed his nose and chin. Now that the movie is out and many trailers are available, I felt it was time to correct few things.
As you can see, I still wasn’t able to tackle the hair and didn’t want to use the old school textured cards. Most Maya based Animated Feature studios probably use Joe Alter’s Shave and Haircut plugin nowadays and I ordered a trial license to give it a go but I still haven’t received it so … proxy hair will do for now.
Here are some screenshots and wireframes for you.
If you know a ‘Shave and haircut’ expert willing to help me learn the software, please let me know. Cheers!
Here is where I am. I haven’t worked on the feet yet. Two days into it, I just need to adjust some edge loops, get rid of triangles then it will be done. Next is Vitaly then some Brave characters, just because modeling characters is fun!
Ah and some wireframes. The arms are still pretty low polygon.
Today was a really hot day. 37C or 100 Farenheit… HOT!
Nothing like going to the café down the road and sketch some of the patrons by such temperature! I have also started using a new 0.1 Uni Pen. I was recommended a similar Staedler felt pen but they don’t do that brand at my local art store.
There is no messing around with such tool, you got to be have a clear idea where you are going as each line counts.
If you are wondering, we are in delayed pre-production at work which means no work … or income. It sucks so I’d better make the most of it and keep myself busy.
[update] Well well well… I was reading James Robertson’s blog this evening and said to myself. What about if I added some colours in Photoshop?! Learning watercolours is a big struggle for me and once you put the paints on the paper, it is too late for corrections.
Crazy I never thought about using digital paints! I was probably in the mindset that retouching sketches afterwards is cheating. At the end of the day, it is only about the final product isn’t it? And the learning obviously 😉
And here is something I am working on if you are not following me on Vimeo
Ever wondered how dense those Pixar meshes are? I have!
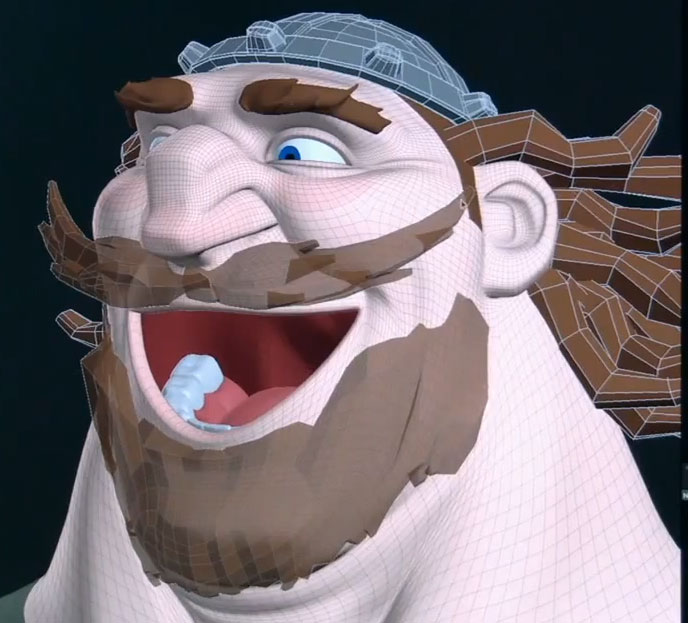
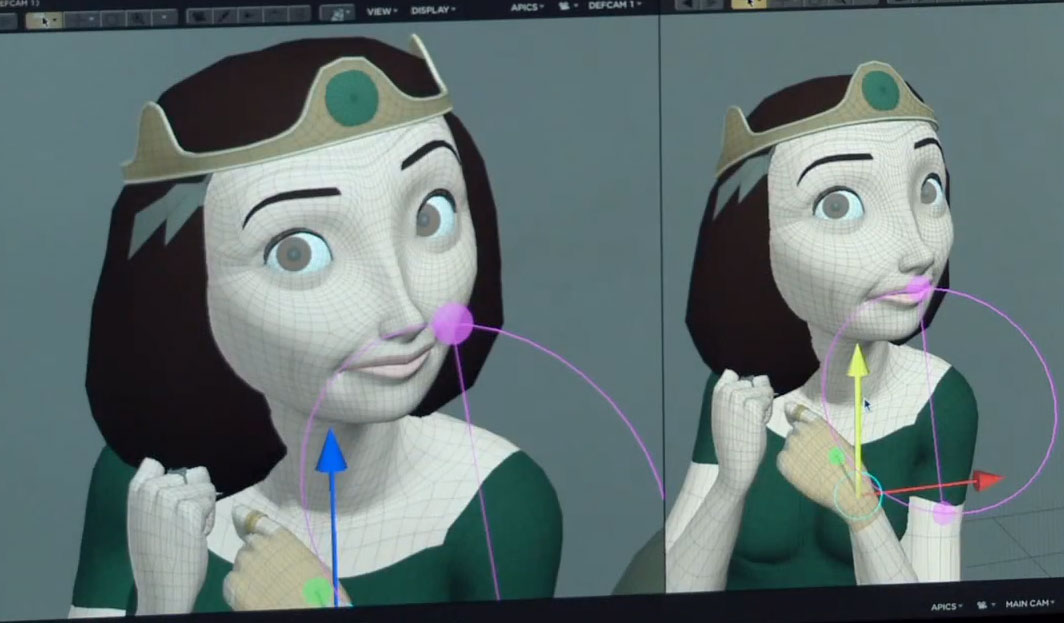
You are in luck, Pixar just released some video footage where we can see the wireframe mesh of both Queen Elinor and King Fergus!
Except the helmet, hair and moustache the mesh is pretty dense. I wonder whether they add one more pass of smoothing at render time though.
Those are probably not the low poly meshes anyway but we can already notice an E pole on the cheeks. This could possibly means Pixar doesn’t use Nurbs surfaces anymore.
Click to zoom in.
And here is the Behind the Scenes video with, 2 minutes into it, Animation Collaborative‘s Michal Makarewicz. (a great school to attend if you are in the San Francisco area or crazy enough to relocate for three month 😉 )