I will make the most of the fresh Movies Insider video article to finally plug Chris Brejon’s almost biblical lighting article which I started reading this summer while I was rendering some shots. The 10 chapter series is so in-depth that I never found the time to finish it. One day!
Now if you just want an introduction to lighting, here is good appetizer for lighting from Insider again, with some little behind the scenes from Netflix’s “Over the moon” and other studio’s movies. Like other commentators I will mention that Lighters do the lighting work, not the Animators though, it would takes decades for a movie to come out otherwise 😉
Insider has some really talented journalists I must say. I should repost their cinematography documentaries one day.
Even if Epic came out in 2013 and most of those screenshots might be outdated, I still feel they would be of interest for people interested in facial topology and a good resource for a future overall facial topology article and facial rig calisthenics.
Blue Sky topologies are very rare online so I used ChopRig system lead developer Daniel Lima’s showreel for reference. You will see meshes and wireframes from 2019 “Spies in Disguise” and 2013 “Epic”.
Bastien Dubois‘ latest shortfilm finally aired on French/German TV channel “Arte”.
With its unique animated visuals inspired by Argentinian illustrator Jorge Gonzalez and uneasy theme, I feel really privileged to have been part of this outstanding short film beautifully mixing 2d and 3d techniques.
The short film successfully relates Bastien’s unsuccessful multiple attempts at tackling the atrocities committed by French army during Algerian War of Independence. Not an easy theme to be treated in animation that’s for sure!
French and German viewers can hit the following link to access the short film in full.
For other territories, the short film is currently running in animation festivals so here is a trailer below in the meantime. The trailer’s music is not reflective of the final soundtrack 😉
Come back to this post in the next weeks as I will add some behind the scenes if I get the all clear from the production.
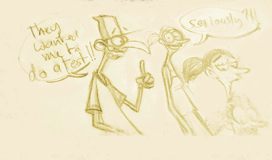
Great CTN Pixar roundtable during showing diversity at Pixar. Hosted by none other that Luis Gonzalez, the talks centers around how Pixar artists Paul Abadilla, MontaQue Ruffin and Mike Yates got into animation, and they kindly share their journey up to joining Pixar.
“If you don’t have time to listen to podcasts, maybe you have time to read them!”
Let me introduce to you, a little project I setup few week ago, a blog where I am sharing transcripts of my favorite animation podcasts.
Why transcripts?
Podcasts have grown massively in the past 10 years and if you are not part of a high-end or animated feature online school, podcasts would be the next best thing to learn what goes on at top Feature Animation studios and hear about the workflow and techniques used in those studios.
Sadly, if you are new to the animation industry, there is no way you will be able to catch up with all the podcasts and fabulous interviews that have been recorded until now. The iAnimate podcast alone, has featured more than 75 guests accounting to more than 100 hours of episodes!!!
On top of this, most of the information shared got lost over the time as it is not possible to share specific parts of an interview, neither can you search or cross examine podcasts.
Transcripts on an other hand can be easily be indexed, searched, quoted. Wouldn’t you be interested to quickly Google search the thoughts of all the animators featured on podcasts and who worked on Hotel Transylvania or Toy Story 4 or How to train your dragon?
If you are into Speed reading, having transcripts of podcasts would allow you to quickly swallow up the whole internet!
Most importantly, if English is not your first language or you are just not fluent enough to understand podcasts, services like Google Translate would allow you to finally access that incredible wealth of information.
The Animation Transcripts Community is a free non-profit educational website aiming at making great animation material more accessible.
At the start of this endeavor, I was willing to pay for the services of outsource Transcript companies to write transcripts of only my most favorites interviews but then, I came across Otter.ai, an incredible app/website that automatically generates transcripts using Artificial Intelligence.
No, the results are not perfect, especially when dealing with animation specific terms. It is however a really great start for indexing podcasts and with the help of a community, we could eventually verify and correct and huge amount of A.I. transcripts. This is why I created, the Animation Transcripts Community or ATC, a community website where I would feature my favorite podcasts as transcripts and sometimes with show notes if I feel I need to highlight specific parts of the transcripts.
As explained, direct A.I. transcripts are great if you are in a hurry to share a specific part of an interview but not so great if you want to completely understand an interview so this is why I separated the transcripts in 3 levels of accuracy.
A one mic level of accuracy is a direct A.I. transcript.
A two mics level of accuracy is a first human review of the direct A.I. transcript. Some possible errors might have slipped and some confusing areas will be marked with several stars (***) but the transcript is already very good.
A three mics level of accuracy is the holy Grail. Several reviewers would have gone through and thumbed up the transcript. you don’t have to wait for a three mics transcript though, a two mics is already 95 percent accurate.
Head over to ATC to enjoy some great interviews and maybe become part of the team!
If like me you have been focusing on the artistic side of animation, focusing on life or just hiding under a rock for the past few years, you might now come across several new words that seem to have come out of nowhere and making you feel stupid. Don’t worry, I got you covered!
I will update this CG Lexicon as I come across or remember new ones.
ACES: To paraphrase Chris Brejon, “ACES is a colour management system developed by dozens of professional under the auspices of the Academy of Motion Picture Art and Science.”. I won’t spend time explaining it, Chris did an outstanding work on his website so go read it
Albedo: This is the new fancy word for diffuse when talking about materials.
Alembic caches: Alembic is an open computer graphics interchange framework to cache animated or non animated assets. Nowadays in most production, instead of receiving animated rigs from the animators, lighters would receive alembics in the form of .abc files. Alembics is the record of each vertex position in time.
AOV: This is the new fancy name for render passes.
BRDF: This is related to materials and how they react to light. Here is the Wikipedia short description: ” The bidirectional reflectance distribution function is a function of four real variables that defines how light is reflected at an opaque surface. It is employed in the optics of real-world light, in computer graphics algorithms, and in computer vision algorithms “
Cached Playback: Animators jumping onto Maya 2019 got particularly irritated with the introduction of the Dynamic Cache playback as Autodesk removed the timeline’s Play button and set that preference to on by default. Cache playback is a cool feature but it swallows up all your memory and not all animators are ready to switch workflow yet. It can be really useful when working on a sequence with several characters if you don’t have a GPU toggle script so I am a lot more excited about fast interaction with rigs and parallel evaluation for the most part.
DCC: (Digital Command Control) This is simply an acronym for the word software/package. Since when is it uncool to say “Software”? Let me know in the comments.
Nuke: Before Nuke, Shake was the predominant compositing software but Apple bought it, then killed it. Good bye Shake, hello Nuke. Nuke is the current almighty compositing software used at top companies.
Parallel evaluation: Until Maya 2016, no matter how many processors or cores your machine possessed, only one core would be used by your 3d animation software (DCC 😉 ). Parallel evaluation is a game changer, with Parallel Evaluation, all the cores available on your machine are now used when interacting with your rig, giving you substantial speed gain, even on rigs deformed by numerous deformers or corrective shapes. GPU acceleration is also available with Parallel but I haven’t work in a production where the GPU acceleration was stable yet, hopefully it will happen eventually.
DG evaluation: well there is nothing new with DG as this is the way Maya has always linearly evaluated mesh deformations but the term might come more often in conversations since Maya might revert to DG in situations Parallel fails.
UDIM: Traditionally when creating an asset’s texture, you would unfold all the parts of the asset tightly into a single square texture. This technique was very memory efficient but had the drawback of complexifying resolution changes on specific elements of the asset . Instead, using UDIMs, you gain a greater amount of flexibility as you are not bound to that single texture anymore as you can now separate the different parts of the asset into separate UV geographic locations (UDIMs). Making a higher res or lower res of a specific part of the asset doesn’t require modifying the entire layout of all the UVs anymore.
Deep compositing: People might compare Deep to Zdepth but Deep is a bit more complex. I will just say that it is a compositing term and working in Deep allows fancy compositing tricks in a package like Nuke. Instead of addressing 2d pixels, Nuke can now sees the scene in 3d and interact with it in 3d. This way you could modify the 3d lighting of a scene without having to re render it. Unlike Zdepth, Deep works fine with motion blur, depth of field or semi transparent object. Obviously this requires a ton of hard drive space so it is not suitable for every production.
Cryptomatte: This is an other compositing term where mattes are automatically generated by the DCC so mattes can be extracted through directly picking objects or entering object names.
Deltamush : Originally a plugin for several DCCs, Deltamush has been integrated in Maya 2016. Deltamush helps to smooth out the skinning of a character.
BakeDeformerTool: This is a tool that can be used in conjunction with Deltamush to bake the deltamush result into a new skin binding, without the Deltamush overhead.
Denoiser: Traditionally when rendering with radiosity, a lot of noise can appear at lower settings and when trying to speed up rendering time. Using a Denoise filter, you can automatically process the picture and reduce the noise to simulate higher settings. It is a cheat but the results are very impressive especially with the Nvidia Optix A.I. accelerated denoiser
animBot: well … who doesn’t know animBot? 😉 animBot is the non-free replacement of aTools. Some animators can’t live without aTools or animBot. Personally I only use aTools’ arcTracker and sometimes the aTools Tween machine if I don’t already have Justin Barrets Tween Machine already open, for the rest I already have my own scripts or techniques.
IK/FK match: I worked on some production where people didn’t understand what IK/FK match meant. IK/FK match is a rig feature or a separate script given by the riggers or TD to allow the animators to seamlessly switch from IK to FK or FK to IK without having the arm or leg going back to an original pose. This is a feature heavily used when posing characters as animators would pose an arm in IK for ease of use for example, then do an IK/FK match to start animating in FK.
A.I.: as far as I know, A.I. can’t do quality keyframe animation so we will ignore it for now!
Viewport 2.0: For years it was just a joke, as soon as you started at a company, you would be told to disable it or Maya would crash. It got stable on my last gig and Maya relies on it a lot nowadays so give it a try again. My friend Mariano is the one who reintroduced me to VP2 as he uses it to make most of his renders