
Back from CTN part I
Posted on November 26, 2012 |
10 Comments
Filed under Animation, Education
[disclosure: This blog post might be biased as Mike Makarewicz gave me a free Tshirt to thank me for supporting Animation Collaborative 😉 ]
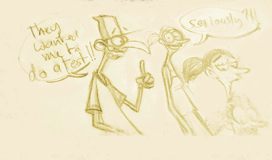
So I am back from CTN-X. CTN 2012 was a great success this year again with some really good guests like Andreas Deja one more time and CTN first timer Glen Keane.

Some of the conferences were a bit too generic especially the ones hosted by people who didn’t know the guests very well but there were plenty of great ones that went into the nitty gritty part of the animation process.
Animation Collaborative had a one of a kind demo this year with their “4 different approaches to Acting : context and creativity with Michal Makarewicz, Victor Navone, Rob Thompson and Aaron Hartline“. For that presentation they used a pretty bland audio clip that sounded like a Brian Tracy unless it was a Napoleon Hill audio book, and they went on explaining their tought process for animating a character to that audio clip. Michal had to shorten his presentation unfortunately but the presentation was really interesting. Ah, Victor was the only representative of the Step Key workflow, all the others used the Spline method.
I also attended an other demo with Michal Makarewicz which was way more insightful than the title implied: “Animate a take like a pro”. I know Michal pretty well as I attended Animation Collaborative last year, had a pretty long chat with him at Siggraph few years ago and he was also featured on several Animation Mentor lectures. Mike is also known to be one of the fastest animators at Pixar so it is always very interesting to see him animating and this time, despite the issues he had with Maya and one TV dying on us (compatibility issue with the Cintiq we got told), his demo was great.
As the title implied, using a Norman mod that looked like Sulley from Monsters Inc, he showed us how he would animate a take, using as reference, the shot from the famous Chuck Jones tribute sequence were Sulley fears Boo is being crushed in the trash compactor.

I knew Mike was a “layer animator” but I didn’t know how much he relied on properly setup hotkeys and additional scripts. As he said, all the interactions with the keyboard should be very intuitive and rely on muscle memory instead of having to look down where you fingers are going everytime you want to do something.
As such and with great difficulties, he set up all his Maya hotkeys to be on the left side of the keyboard. “You don’t want to cross the keyboard” he commented. If you have been following this blog for a long time you know I share the same views and I posted several workflow tips on how to make Maya more animator friendly. [Having only recently used Maya 2011 and 2012 I have had to face some incredible issues with the new hotkeys interface and eventually found a fix which I will share it with you very soon, I hope this was fixed in Maya 2013]
His other tip and probably the core of his fast workflow is to work in spline and copy the graph editor curves from one channel to an other as often as possible and scale, mirror or offset the curve when needed.
In the demo for example, he took the Hips TY (translation of the hips in Y) and copied it to the shoulders after inverting and offsetting it. There was also some nifty graph editor value operation using the *=.25 expression which was an “ahah moment” for a big part of the crowd and a never seen, at least for me and a good chunk of the audience, lattice graph editor scaling script which he used to create some residual energy for the head Y rotation on the settle.

He also explained that we shouldn’t “mess with the math” in the graph editor and never create kinks or overshoots with the tangents (Mike uses weighted free tangents only) instead you want to flatten the tangents and play with their weight. Here is an example of what he would do for a bouncing ball.


Alright that will be it for today, ah just to finish, I went to see Wreck-it Ralph at Disney’s El Capitan theatre on Hollywood boulevard and it was very good. I was expecting something a bit commercial with all the pop culture references and product placements but there was a great surprise with a specific scene I don’t want to spoil for you. Let’s just say, there was some of the magic from Tangled in the form of some very hearful moments were we couldn’t help feeling for the characters.

Talkback :
My post already brought some questions so here are the answers.
What is this *=.25 thing?
In the Graph editor, it is possible to adjust the value of a selection of keys by entering some expressions in the Key stats box. Here is how it works (click to enlarge the pictures):


And by checking the Maya online documentation, I realised the Lattice key deformation tool he used is not a script but actually part of Maya. Here is where you will find it and by double clicking on it you will access more options

-
Search
-
-
Links (mostly outdated)
- A Commentary
- Alberto Cerriteno
- Alfo S.
- Alison
- Andrea Blasich
- Andy Thomas
- Animation archive
- Animation mentor
- Anna Yamazoe
- Arte y Animación.
- Asifa Hollywood
- Avalanche Software
- Big Screen Animation blog
- Bobby Chiu
- Bonvoyage airlines - Bonvoyage airlines webdesign agency
- Box Office Mojo
- Brad Kinley
- Brandon Beckstead
- Brock Gallagher
- Brock-O-Rama
- Carmelo
- Cartoon Brew
- CGIndia
- Chad Sellers
- Char Blarg blog
- Character animation studio
- Character design blog
- Character design notes
- Chicken Toast
- Chris Davis
- Chronicles of an animator - David Martinez blog
- Conceptart.org - messy forum as usual but you can find some gems
- Deja View
- DJ - He is not a real DJ but that’s his name anyway
- DMCA
- DNA guys
- Drawn
- Enrico Casarosa
- Erlend
- FEED
- Feng Zhu
- Florian Satzinger
- Framefilter
- fxguide
- Golgoth13
- Henry Sanchez
- Jamaal Bradley
- Jason Schleifer
- JimHillMedia
- John K - this is not John Khars here but Ren and Stimpy John Kricfalusi. I am not too fan of the cartoon but
- Joost
- Keith Lango
- Kenny Roy
- Kris Staber
- Kris Staber
- leif jeffers
- Lines and colors
- Maciek Gliwa
- Manfred Ragossnig
- Mark Behm
- Martin K
- Matt Williames
- Mayerson on Animation
- Micha
- MichaelBarrier.com
- Mike Stern
- Milo
- Morgan Kelly
- Nikola Tamindzic - Party photographer
- Passion Pictures
- Peer Lemmers
- Rad How To
- Ray Chase
- Rebecca's blog
- Richie Prado
- Robert Barros
- Rok Andic
- Ross Burt
- Saddington & Baynes
- Sebastien Lasserre
- Spline Bomb
- Spline doctors - They are not really doctors but they will help you cure all your spline problems
- Spungella - Jean Denis Haas blog
- Stephen Silver
- Studio AKA
- Studio Soi
- Subdivision modeling
- Syndicat des producteurs de films d'animation newsletter
- TAG blog
- the A files
- The Art Center
- The art of Dave Pimentel
- The Berzerker
- The CA Blog
- the Plausible Impossible
- Timbo
- Timbo
- Toby Shelton - Dreamworks storyboard artist
- TWEAK!
- Uli Meyer
- Vincil
- Visual news
- Vulcan studios
- Wesley Louis
- WireImage
- Zbrush central
- Ziggy
